Overview of library preparation and demonstration
Overview
Teaching: 30 min
Exercises: 15 minQuestions
How to perform sequencing on the MinION sequencer?
Objectives
Learn the process of the library preparation
Load the MinION flow cell and learn how to run sequencing
Library preparation
In this workshop, we will introduce you the Ligation Sequencing Kit, which is a genome sequencing kit. We are going to use the protocol Ligation sequencing gDNA (SQK-LSK110). In the community, you can review the process in detail. Due to the time and equipment limitation. We will not perform actual library preparation process. We will focus on the flow cell loading and setting the MinKnow software.
Quality controls of DNA samples
A successful sequencing starts with a high-quality DNA sample.
Assessment of DNA samples includes quality, quantity, and integrity. We will introduce commonly used methods to perform quality control of DNA samples.
Note: Here we listed the methods that our team commonly used. Alternative tools might also avalible.
Spectrophotometer (UV-Vis)
Absorbance measurements measure the absorbance of all molecules in the sample that absorb at the wavelength of interest. Nucleotides and proteins have highest absorbance at 260 nm and 280 nm, respectively. The ratio of absorbance at 260 nm and 280 nm is used to determine the purity of the DNA samples. The ratio of ~ 1.8 is considered as a pure for DNA samples. On the other hand, chemicals, and organic compound (e.g., EDTA, carbohydrate, phenol) absorb at 230 nm. The ratio of 2.0-2.22 is expected as a pure for DNA sample.
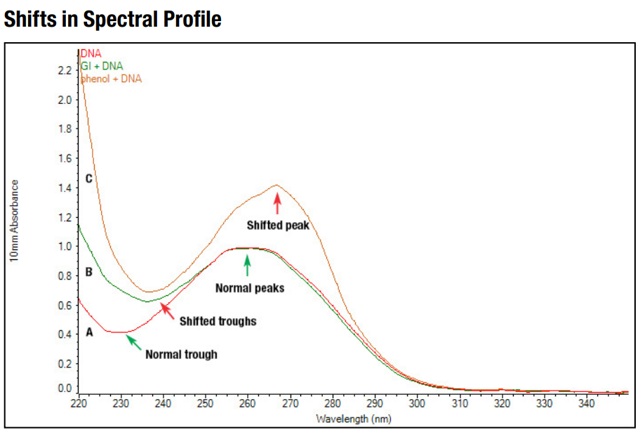
Figure. Spectral profiles of pure DNA (A), and pure DNA with guanidine (B) and phenol (C).
Drawbacks
- Nonselective method: could not differentiate DNA or RNA.
- pH sensitive: acid solution and basic solution decrease or increase 260/280 ratio, respectively.
Advantages
- Cheaper: do not need extra plastic consumables and kits.
- Faster: no additional reaction time
Fluorometry
Compared to spectrophotometer, fluorometric measurement is more specific and sensitive despite the presence of contaminants due to the selective binding between fluorogenic dyes and DNA. Dyes emit fluorenes only when specific binding happens, and the fluorenes will be detected by fluorometer. Concentration of the nucleic acid is calculated using standard curve. Using Qubit dsDNA HS Assay Kit as an example, it can measure sample concentration ranging from 10 pg/μL to 100 ng/μL. Yet, fluorogenic dyes cannot measure the purity of the DNA.
Drawbacks
- Time consuming: reagent-sample reaction takes 2 min required for DNA assay
- Costly: reagents and single-use plastic consumables (Qubit assay tubes) are required
Spectrophotometer vs. Fluorometry
So… which method is better?
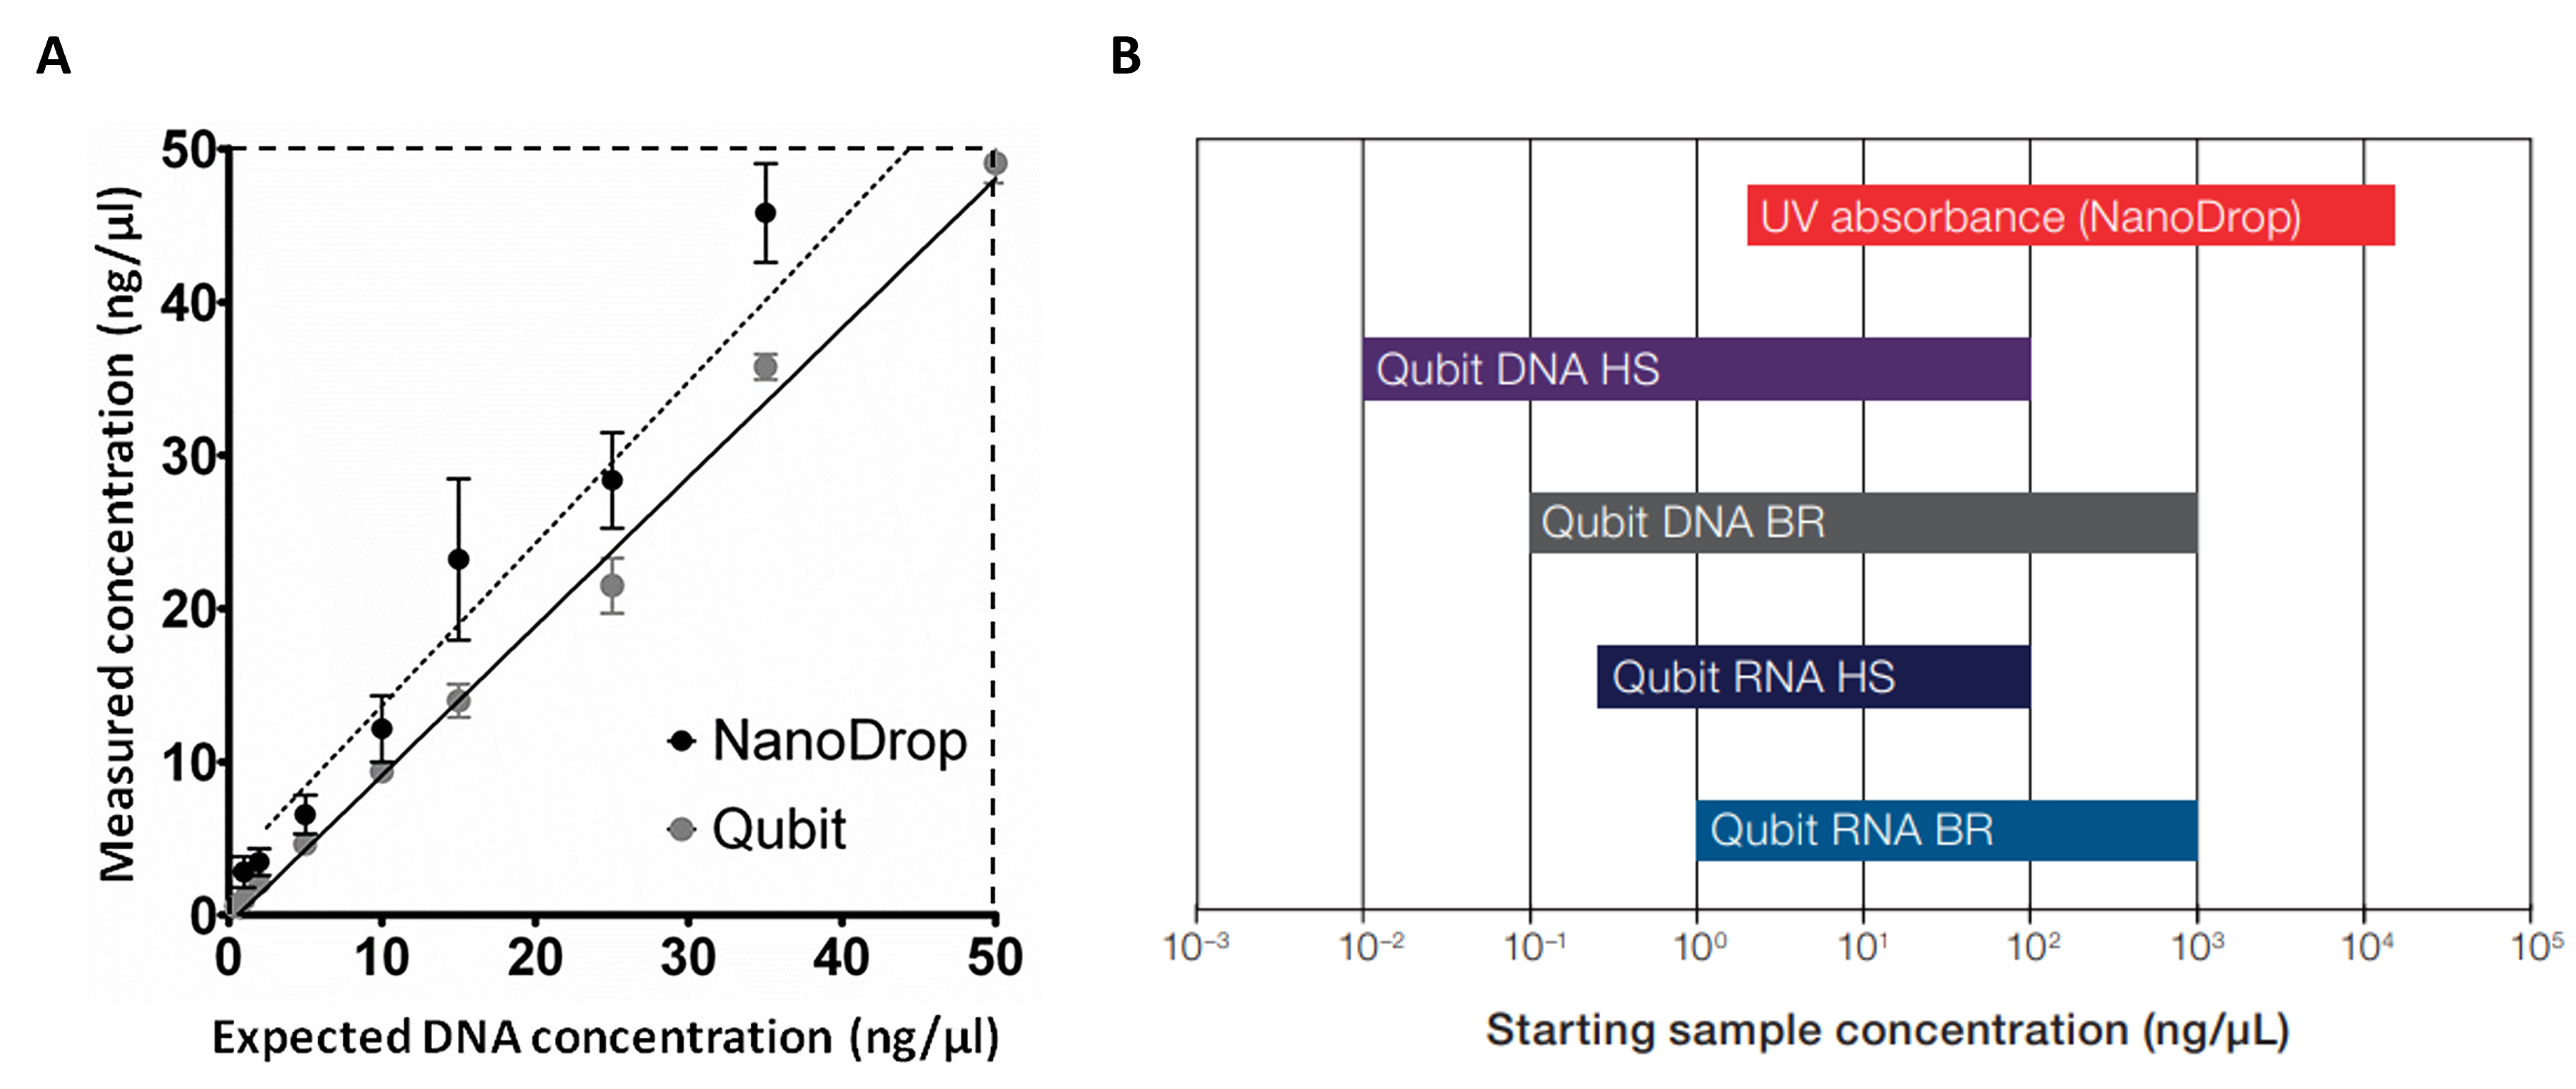
Figure A. Comparisons of repeated measurements (n = 10) between commercial kits (Qubit) and spectrophotometer (NanoDrop). Serial dilution of DNA samples ranging from 50-0.5 ng/µl was used to evaluate two methods.
Figure B. Comparisons of sample concentration ranges among different methods.
Integrity assessment
To evaluate integrity of DNA samples, we need gel electrophoresis systems, such as Agilent 2200 TapeStation Systems. The software provides numerical number of DNA integrity called DNA Integrity Number (DIN) and sample concentration.
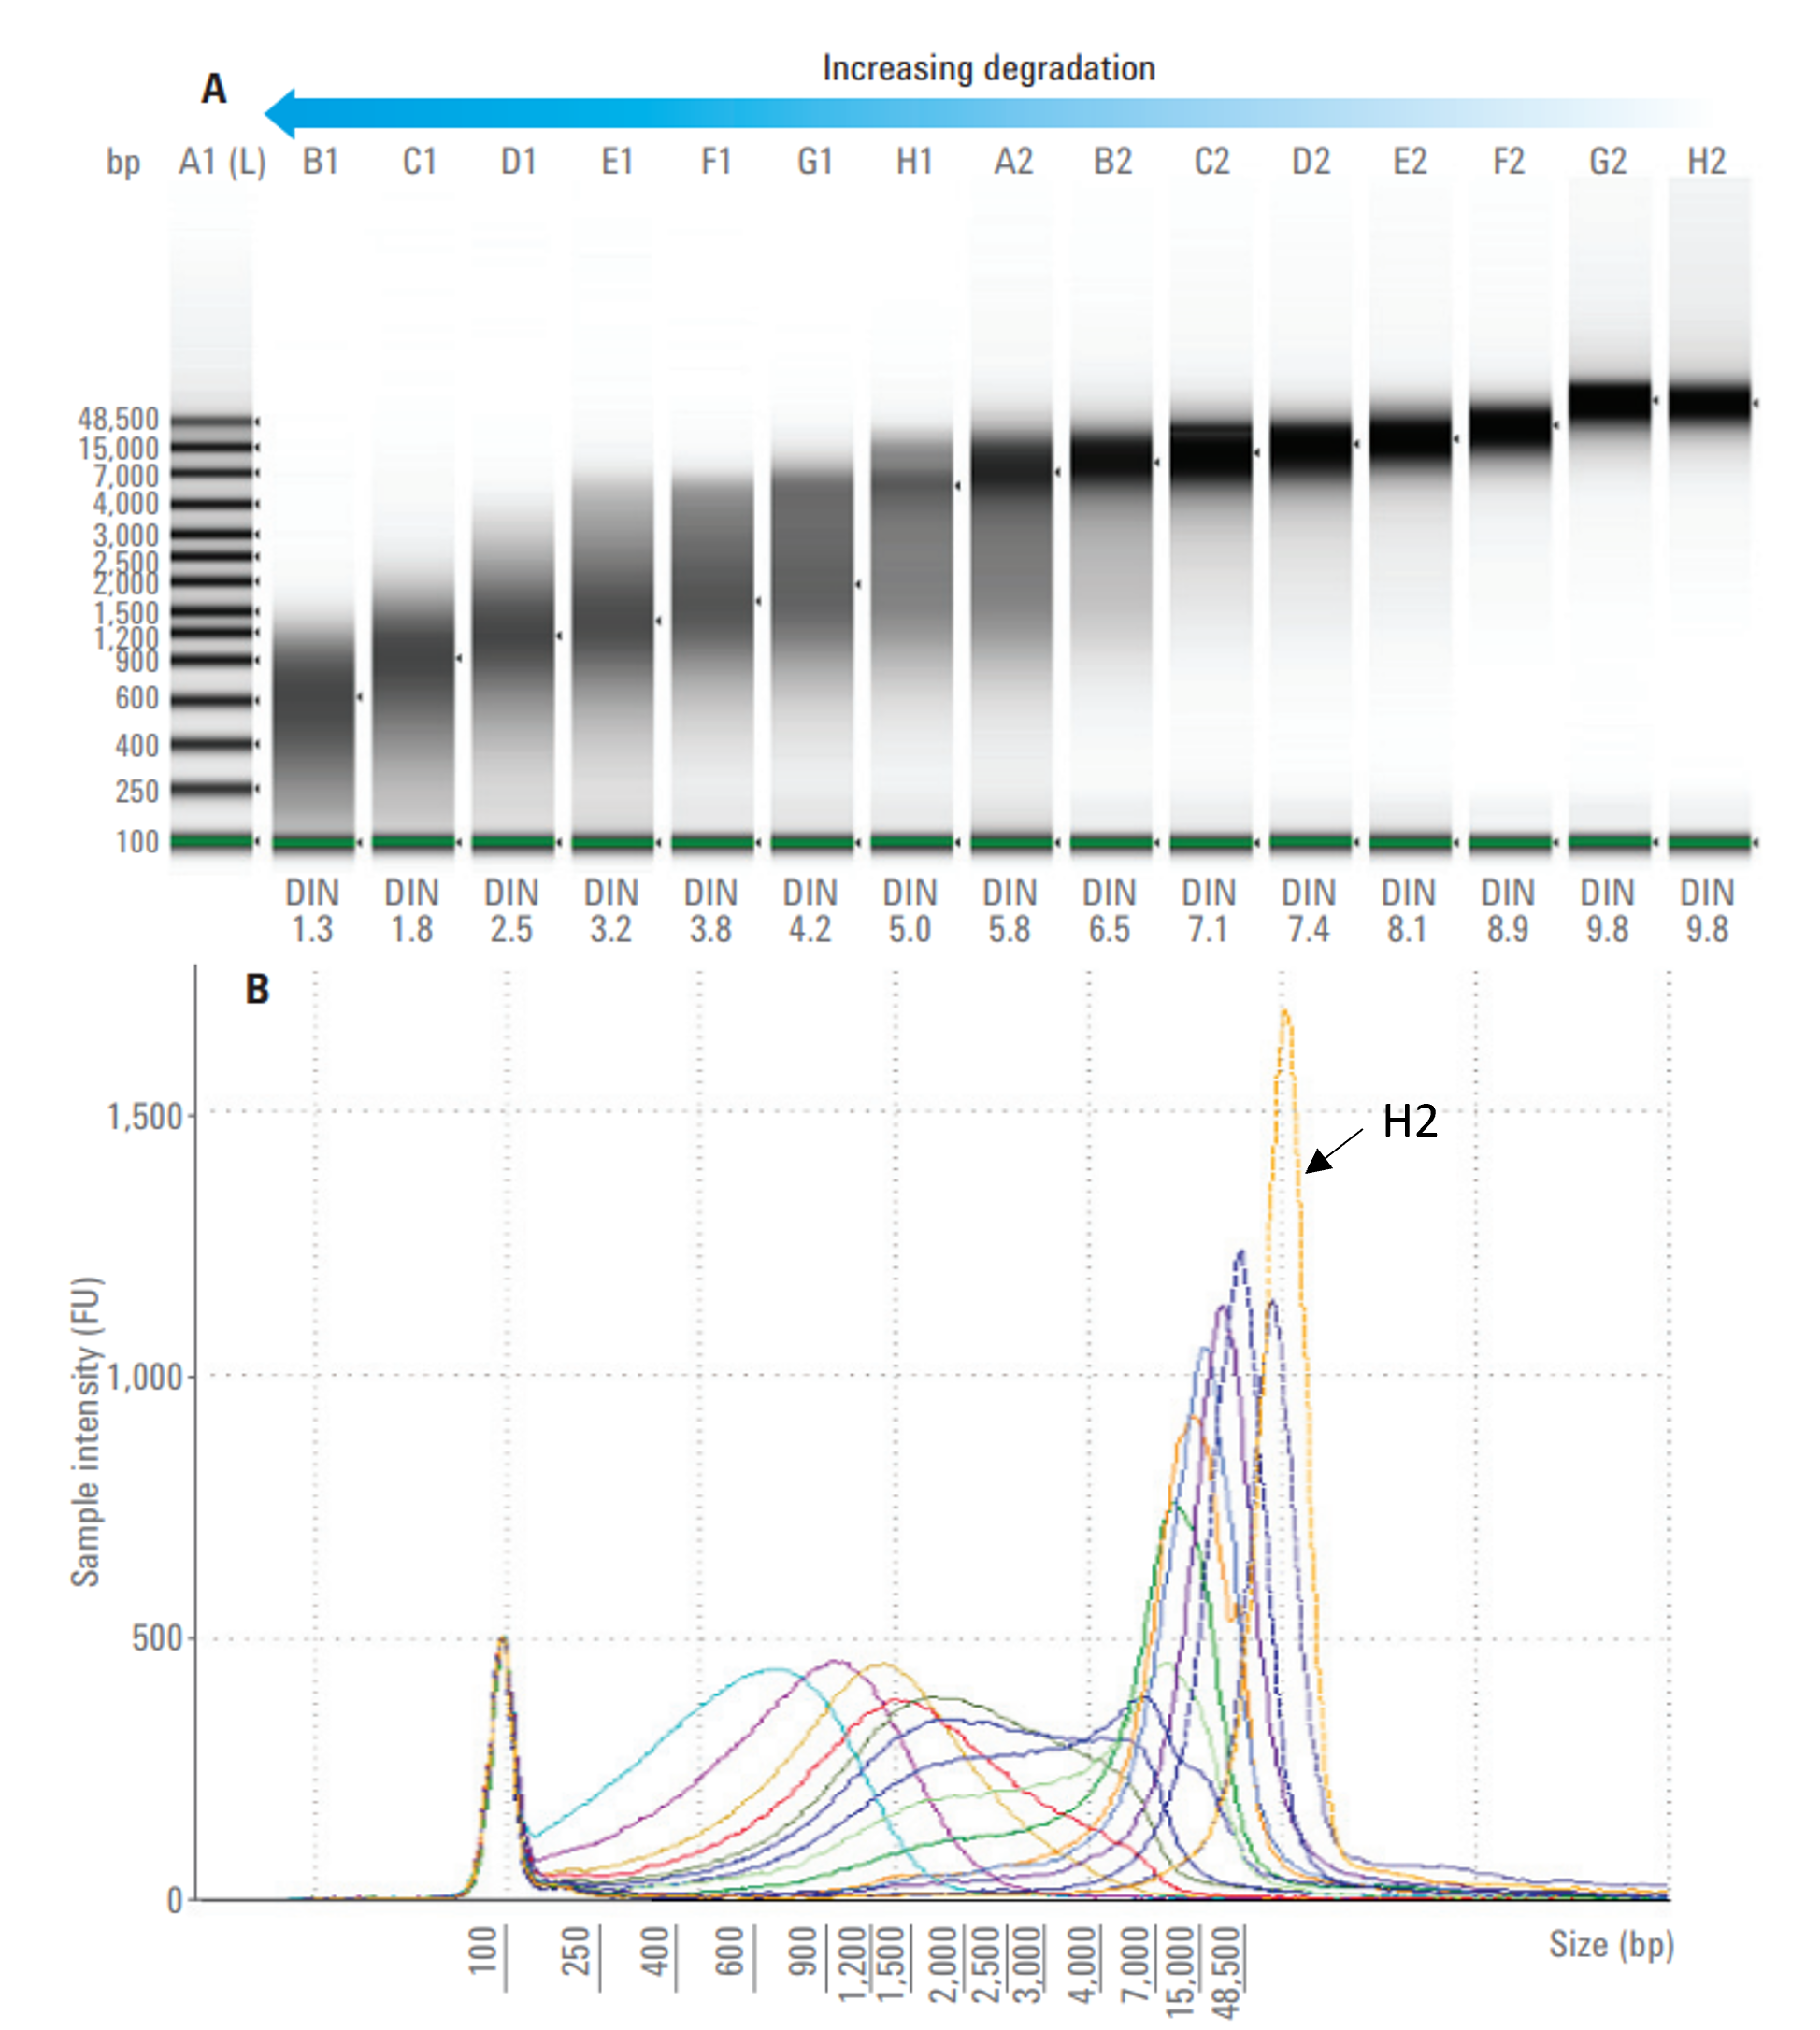
Figure A. The gel image with DNA Integrity Number (DIN). A1: DNA marker; B1-H2: degradation series of 15 g DNA samples (60 ng/µl).
Figure B. An electropherogram of 15 samples from Figure A. Highly intact gDNA sample (H2) has a narrow peak in the electropherogram above the largest ladder peak (48,500 bp).
Ligation sequencing gDNA (SQK-LSK110)
You can find step by step guide including third party reagents, equipment and consumables in the protocol for MinION (R9.4.1). Here we will provide a overview of the workflow.
Optional fragmentation
When should I perform fragmentation of genomic DNA (gDNA)? Although the protocol recommends starting DNA sample concentration is 1 µg, fragmentation might be useful for low input amount of DNA. Also, you might benefit from optimal fragmentation when you are handling very high molecular weight gDNA. Oxford Nanopore Technologies (ONT) provides a review of how factors including fragment size, loading amount, and blocking affect the flow cell output. Here we will discuss how fragmentation affects read N50.
The following figures demonstrate that fragment length and read N50 do not have linear relationship.
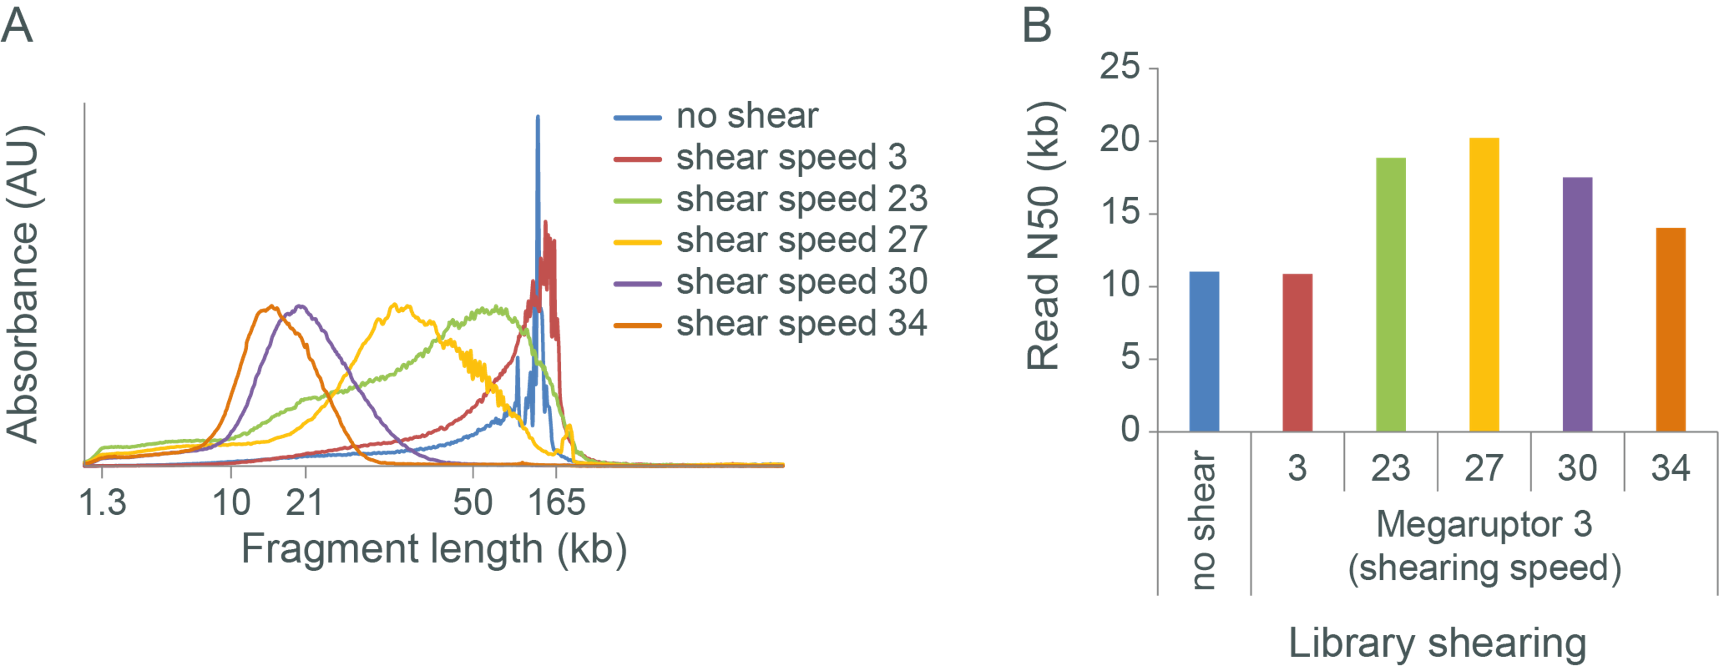
Figure A. Sheared Human gDNA samples were sheared with different speed. The fragment size was analyzed. Increasing shearing speed leads to more fragmented DNA.
Figure B. Unsheared and sheared DNA was used for library preparation using ligation sequencing kit and sequenced on MinION. Fragmentation speed between 23 to 30 increases read N50 when compared with unsheared gDNA. Yet, excessive shearing might have deleterious effect on flow cell output.
Read N50
Definition of read N50 is “the sequence length of the shortest read at 50% of the total sequencing dataset sorted by read length” (Logsdon et al., 2020).

First step: DNA repair and end-repair
Histopathological or histology samples are preserved with formalin fixed paraffin embedded (FFPE) method. However FFPE significantly compromises the DNA quality from the specimens. NEBNext FFPE DNA Repair Mix, a cocktail of enzymes, is used to repair DNA.
DNA fragments do not have homogeneous blunt-ended fragments, so NEBNext Ultra II End Repair/dA-Tailing Module is used to repair overhangs by 5’ Phosphorylation (P). Adding non-template dAMP (dA) to the 3′ end of blunt-ended fragments prevents a continous DNA molecule (concatemer) formation in the following ligation step and permits subsequent ligation of adapter that has complementary 3′-dT overhangs.
Second step: Adapter ligation
Prepared DNA fragments is ligated with sequencing adapters (red) tagged with motor protein (brown). Both template and complementary strands are tagged with motor protein, so both strands will translocate the nanopore. Motor protein has helicase activity and it also control the DNA translocation speed. Once the sequencing adapter inserts into the nanopore, double-strand DNA will be first unwound by motor protein. Electric current drives negatively charged DNA pass through the pore (~450 bases per second).

Genomic DNA sequencing on the MinION sequencer
MinION Mk1B and flow cell
The MinION Mk1B
The MinION Mk1B instrument connects the user’s PC and the nanopore sensor. It provides power to application-specific integrated circuit (ASIC), performs temperature control, protects sensor from electronic noise, and transfer data to the user’s PC. The MinION Mk1B does not have active heating element. The heat generated from ASIC and control of fan speed maintain a steady temperature at 37 °C.
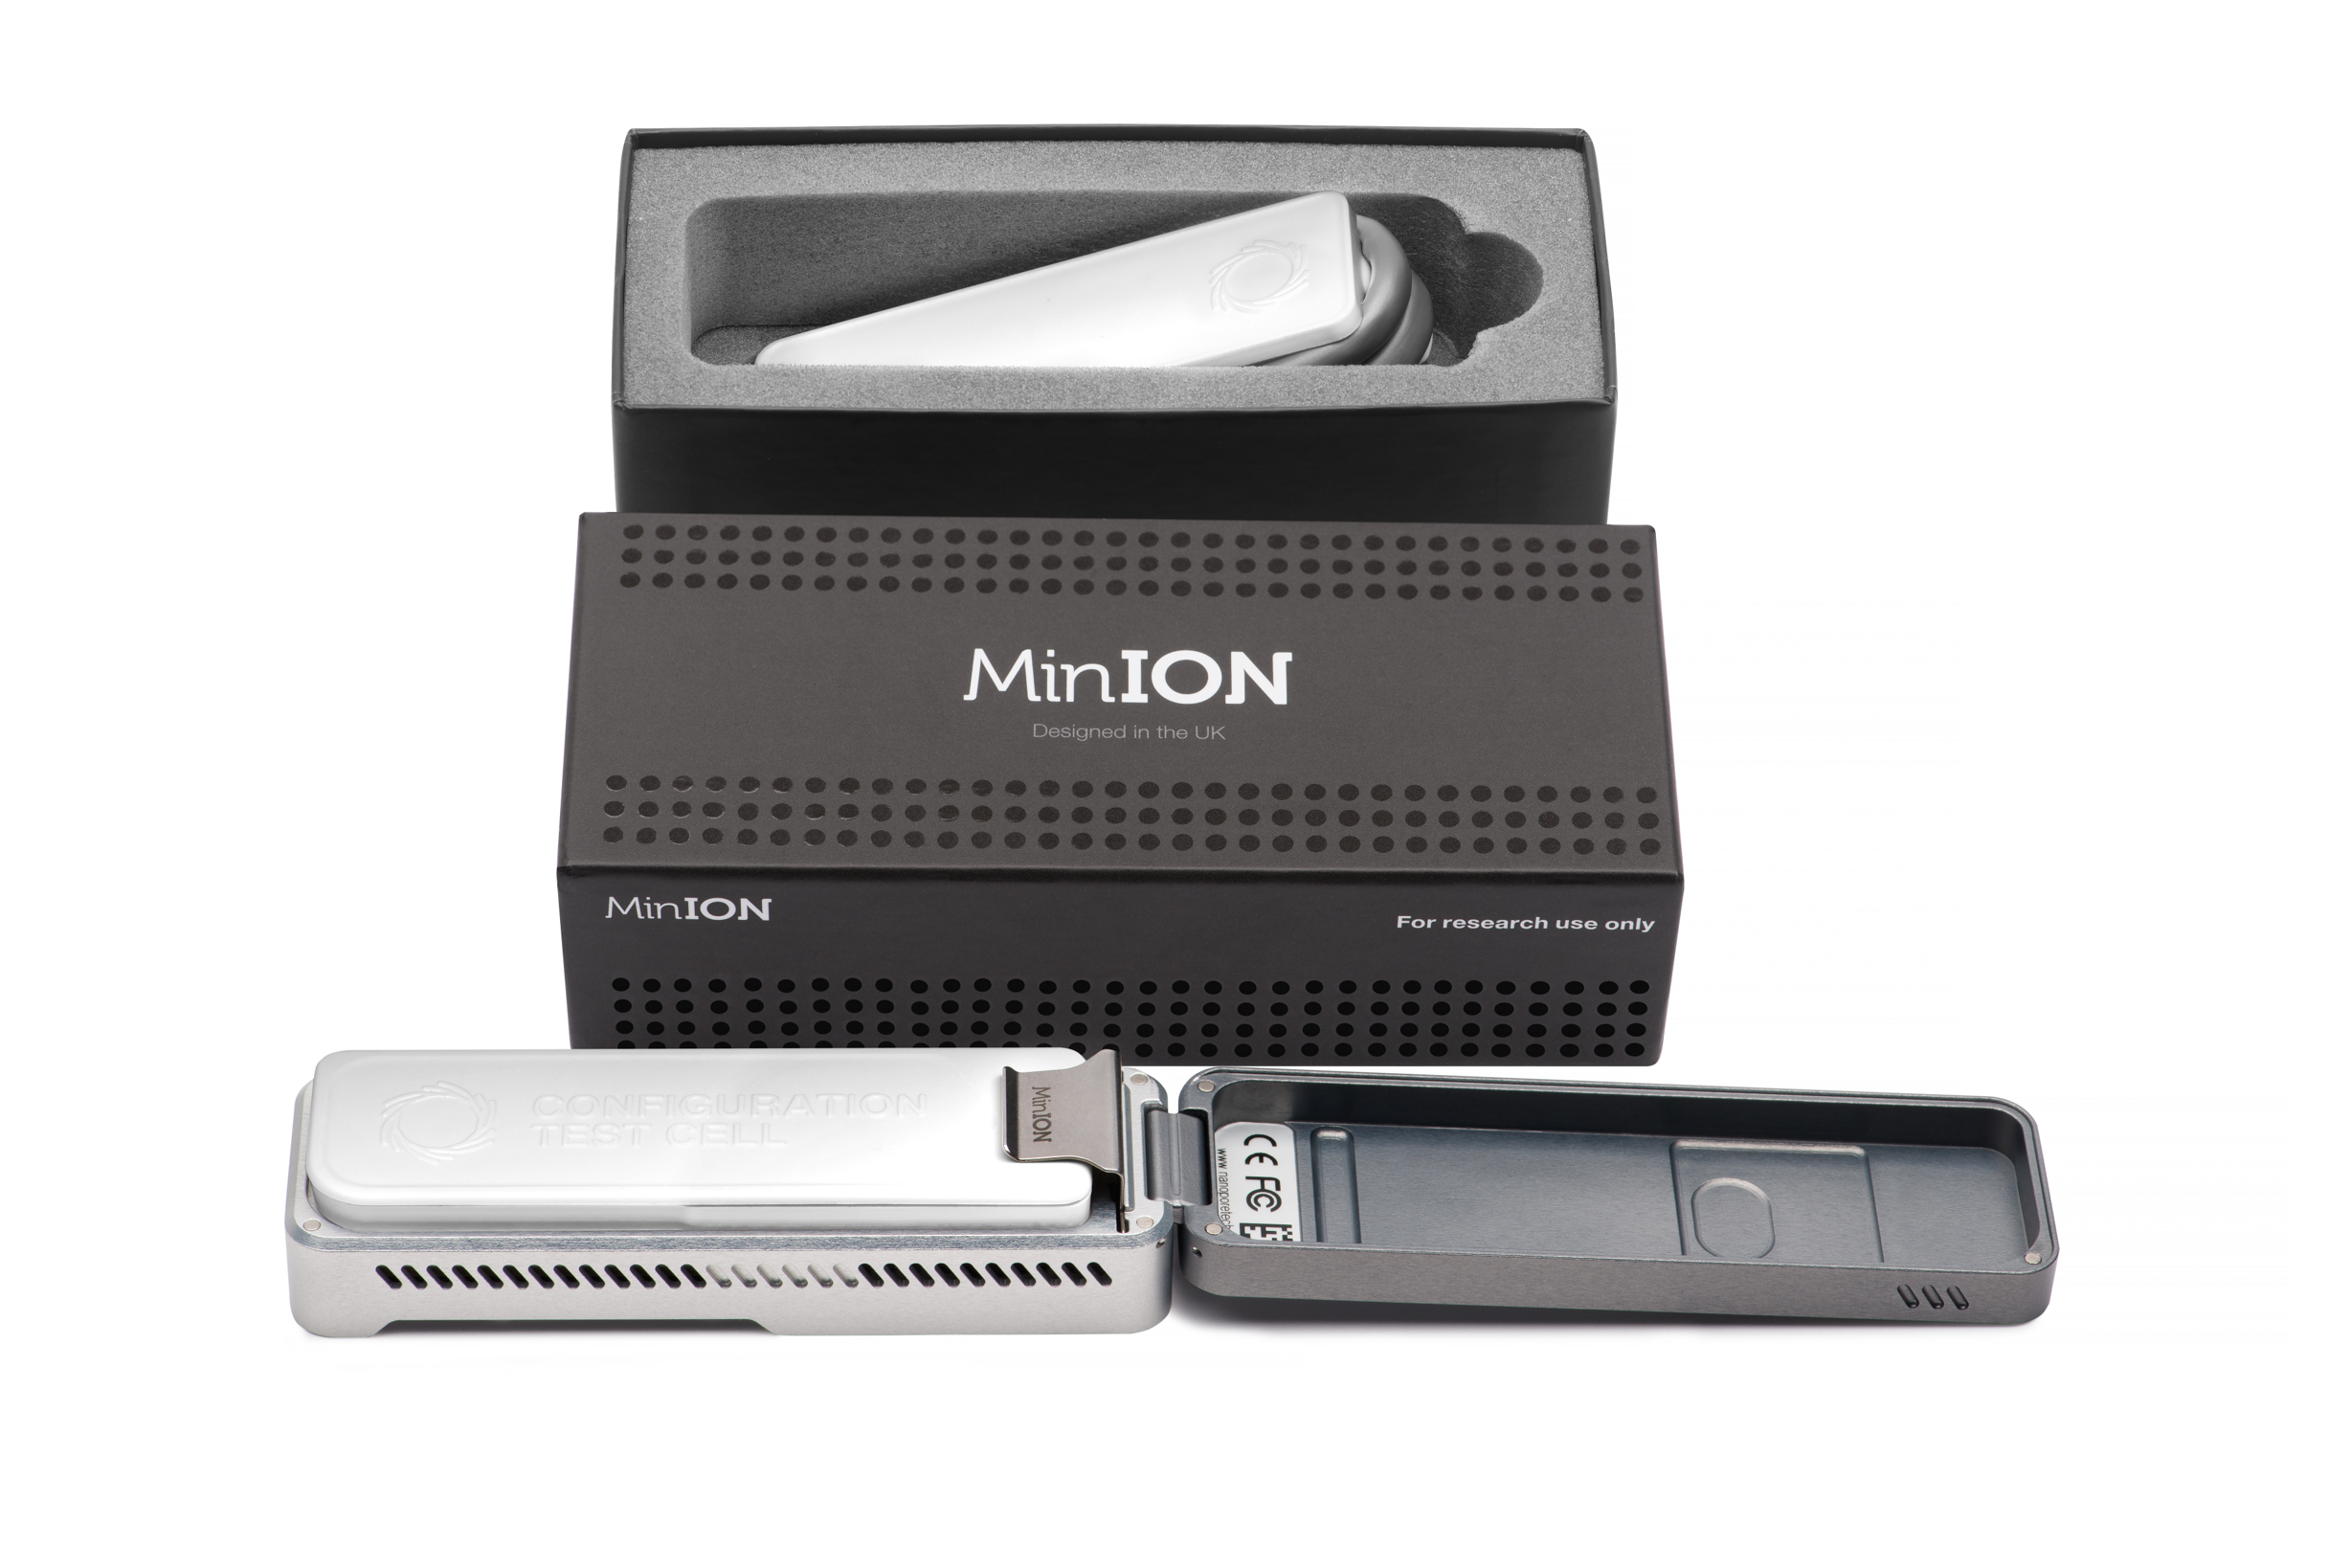
Configuration test cell (CTC)
CTC is used to test the communication between the MinION Mk1B and sequencing software, MinKNOW, on user’s PC.

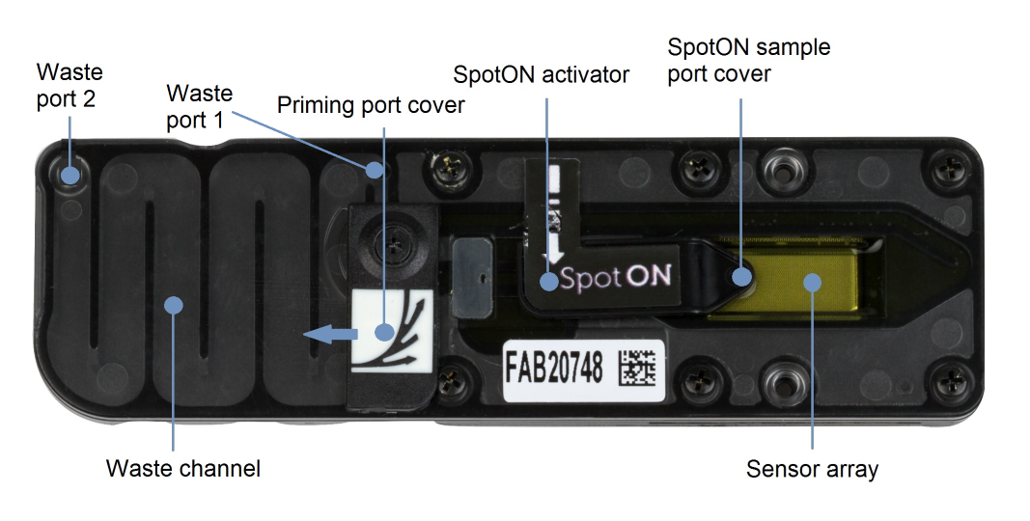
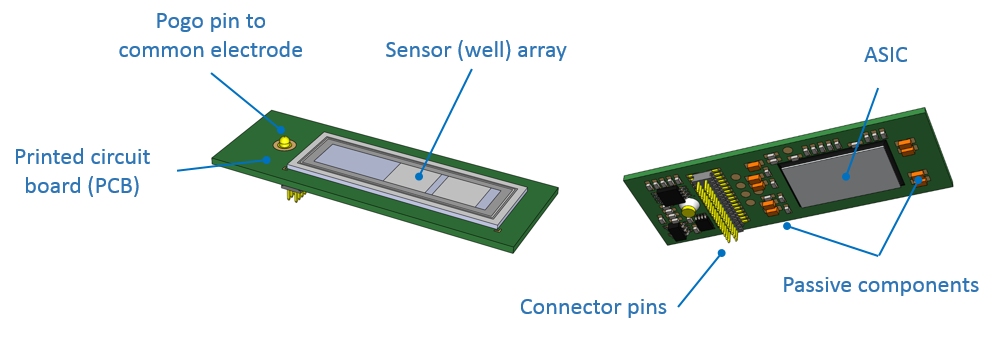
Anatomy of flow cell
The flow cell is a consumable that contains a fluidic interface allowing DNA samples being sequenced. Sensor chip is one of the major components of the flow cell. Sensor array is located on the front of sensor chip. MinION Mk1B flow cell carries (ideally) 2048 active wells (nanopores) on the surface of sensor array.
Storage buffer
The flow cells are shipped and preserved with the storage buffer (yellow). The storage buffer serves different roles: 1) maintaining osmotic balance, 2) allowing current to run through the nanopores, 3) identifying functional pores during flow cell checking.
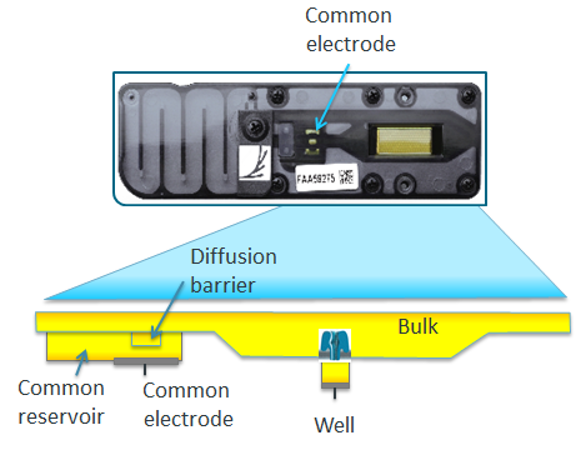
The flow cell is flushed with priming mix (Flush Tether + Flush Buffer; colored in blue) through priming pore to replace the storage buffer in the bulk section before library loading. Priming mix contains tether proteins guiding DNA fragments toward nanopores. DNA library is loaded to sensor array through SpotON sample port.

Flow cell check
Purpose of the flow cell check
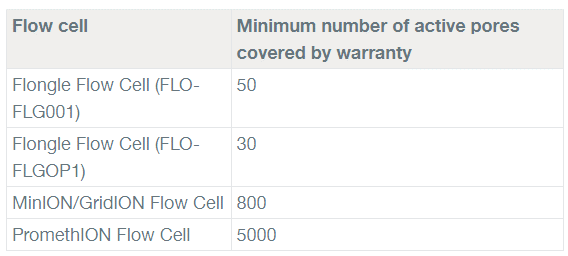
ONT offers a warranty within 3 months from purchase of MinION flow cell. If the active pore number below the warranty number, you can request a replacement.
Running the flow cell check
Before you run the flow cell check, you need to have a PC connected with internet and MinION Mk1B device and your PC also need to be installed with MinKNOW software.
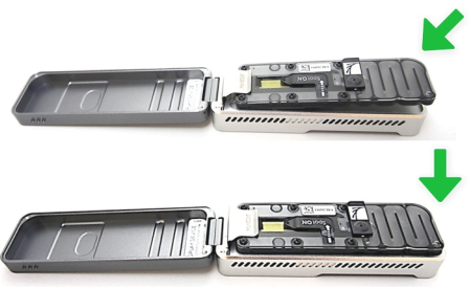
[Step 1] Open the sequencer lid and insert the flow cell. First slide flow cell under the clip, and then press down the flow cell. Note: Do not touch the bottom of the flow cell.
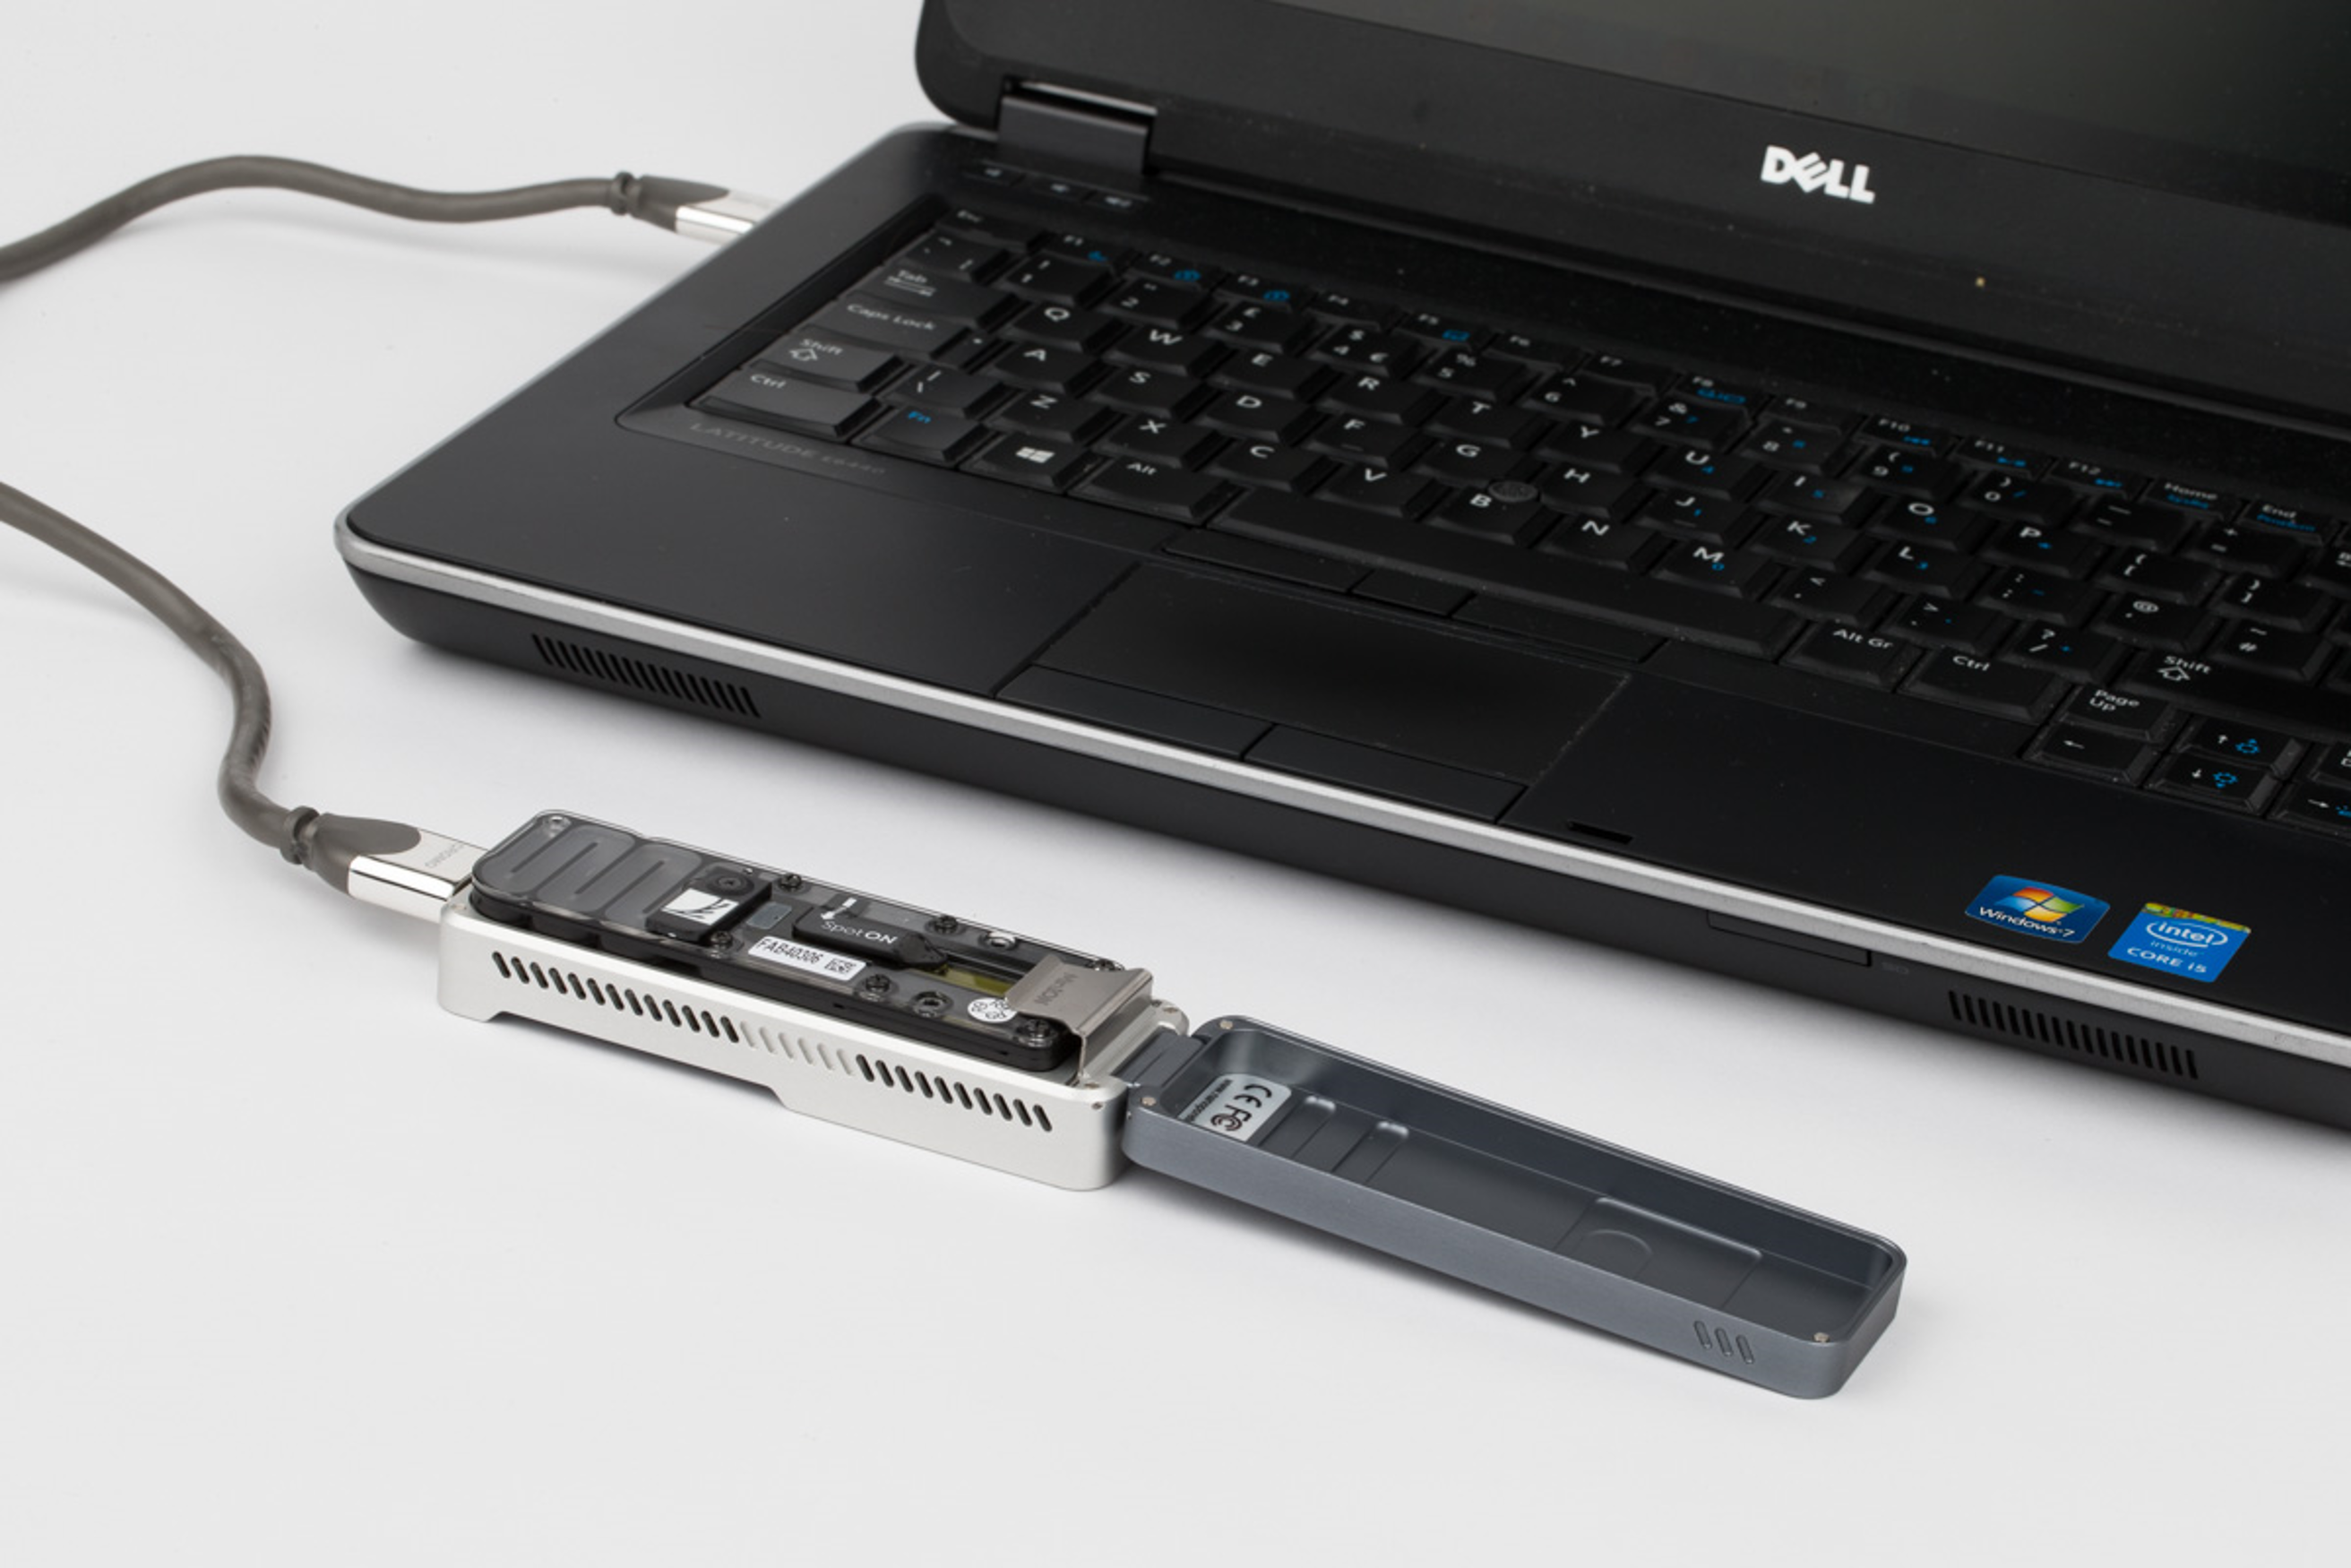
[Step 2] Connect assembled sequencer to your PC. You will see the lights and hear sound of fan if the connection is successful.
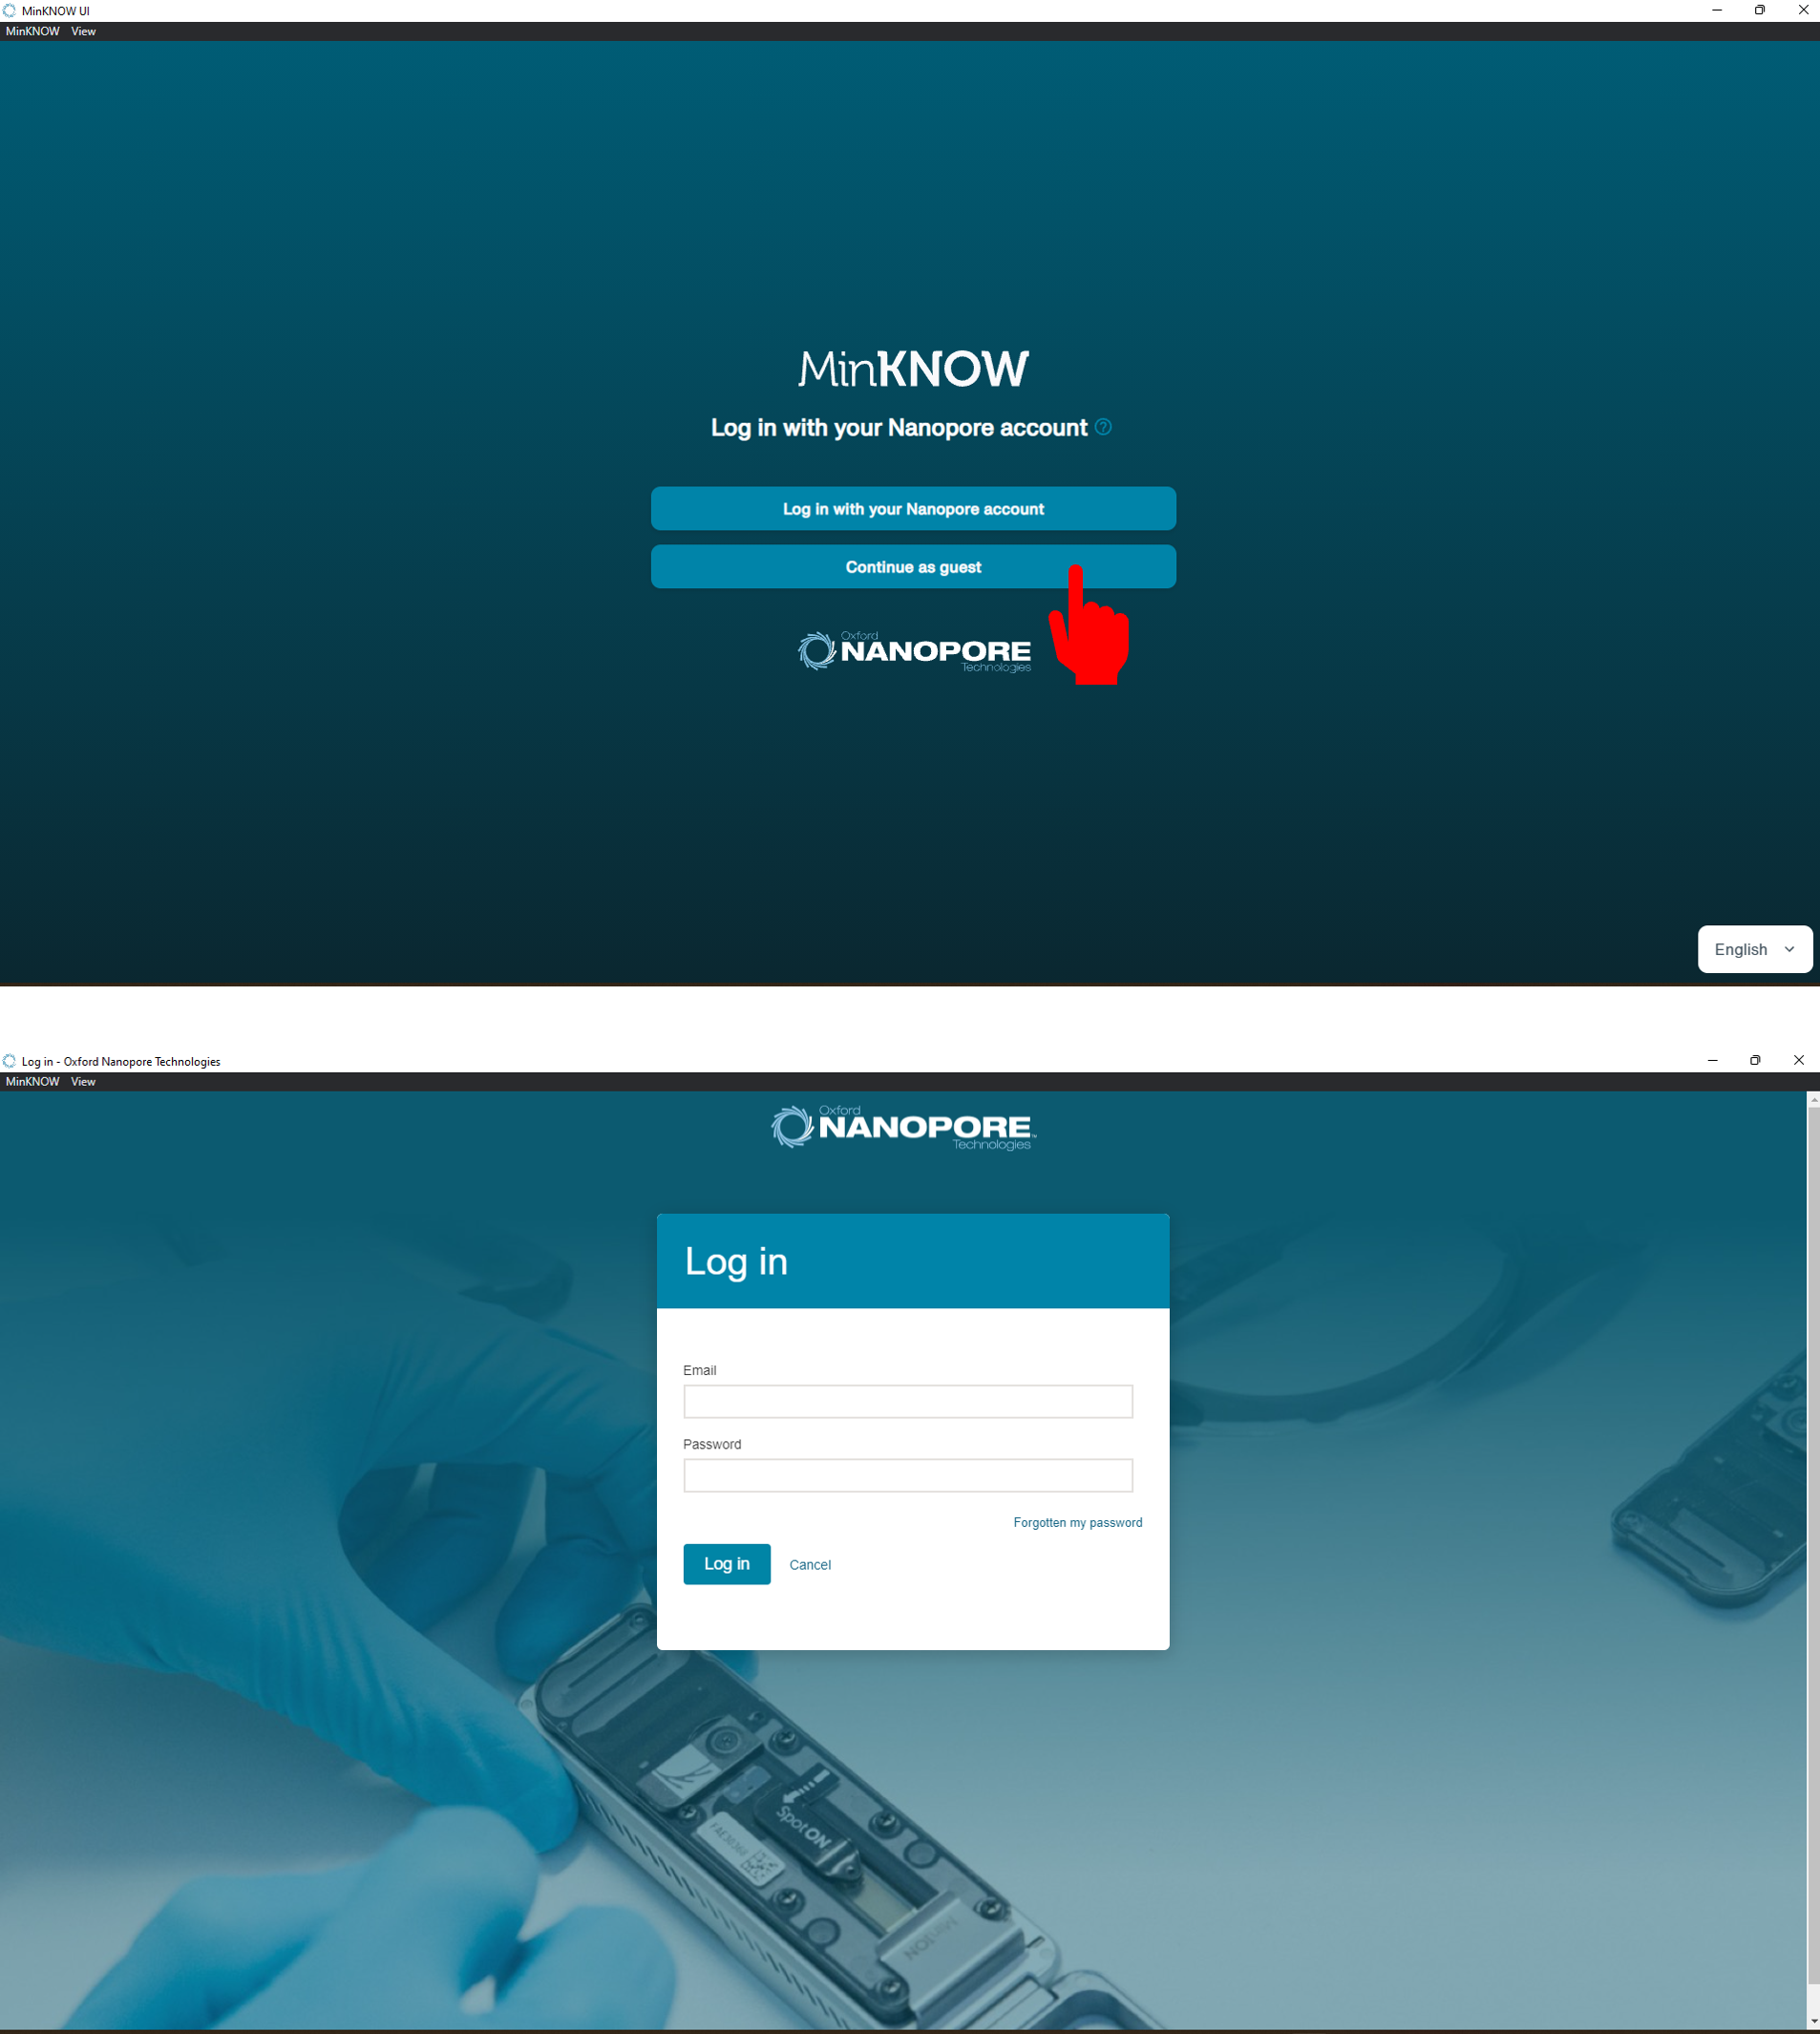
[Step 3] Double-click the MinKNOW icon on your desktop, and log into software.
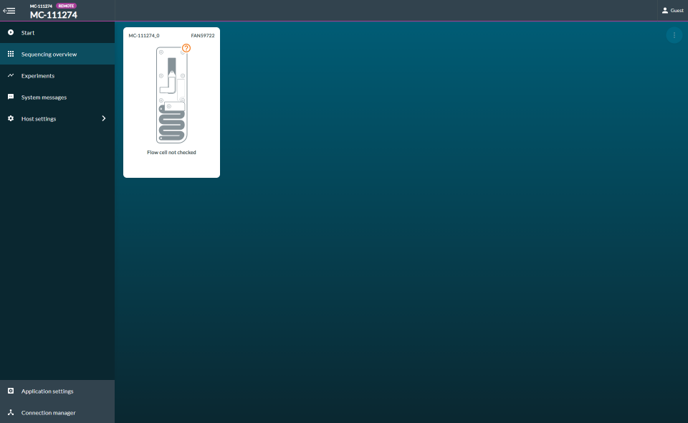
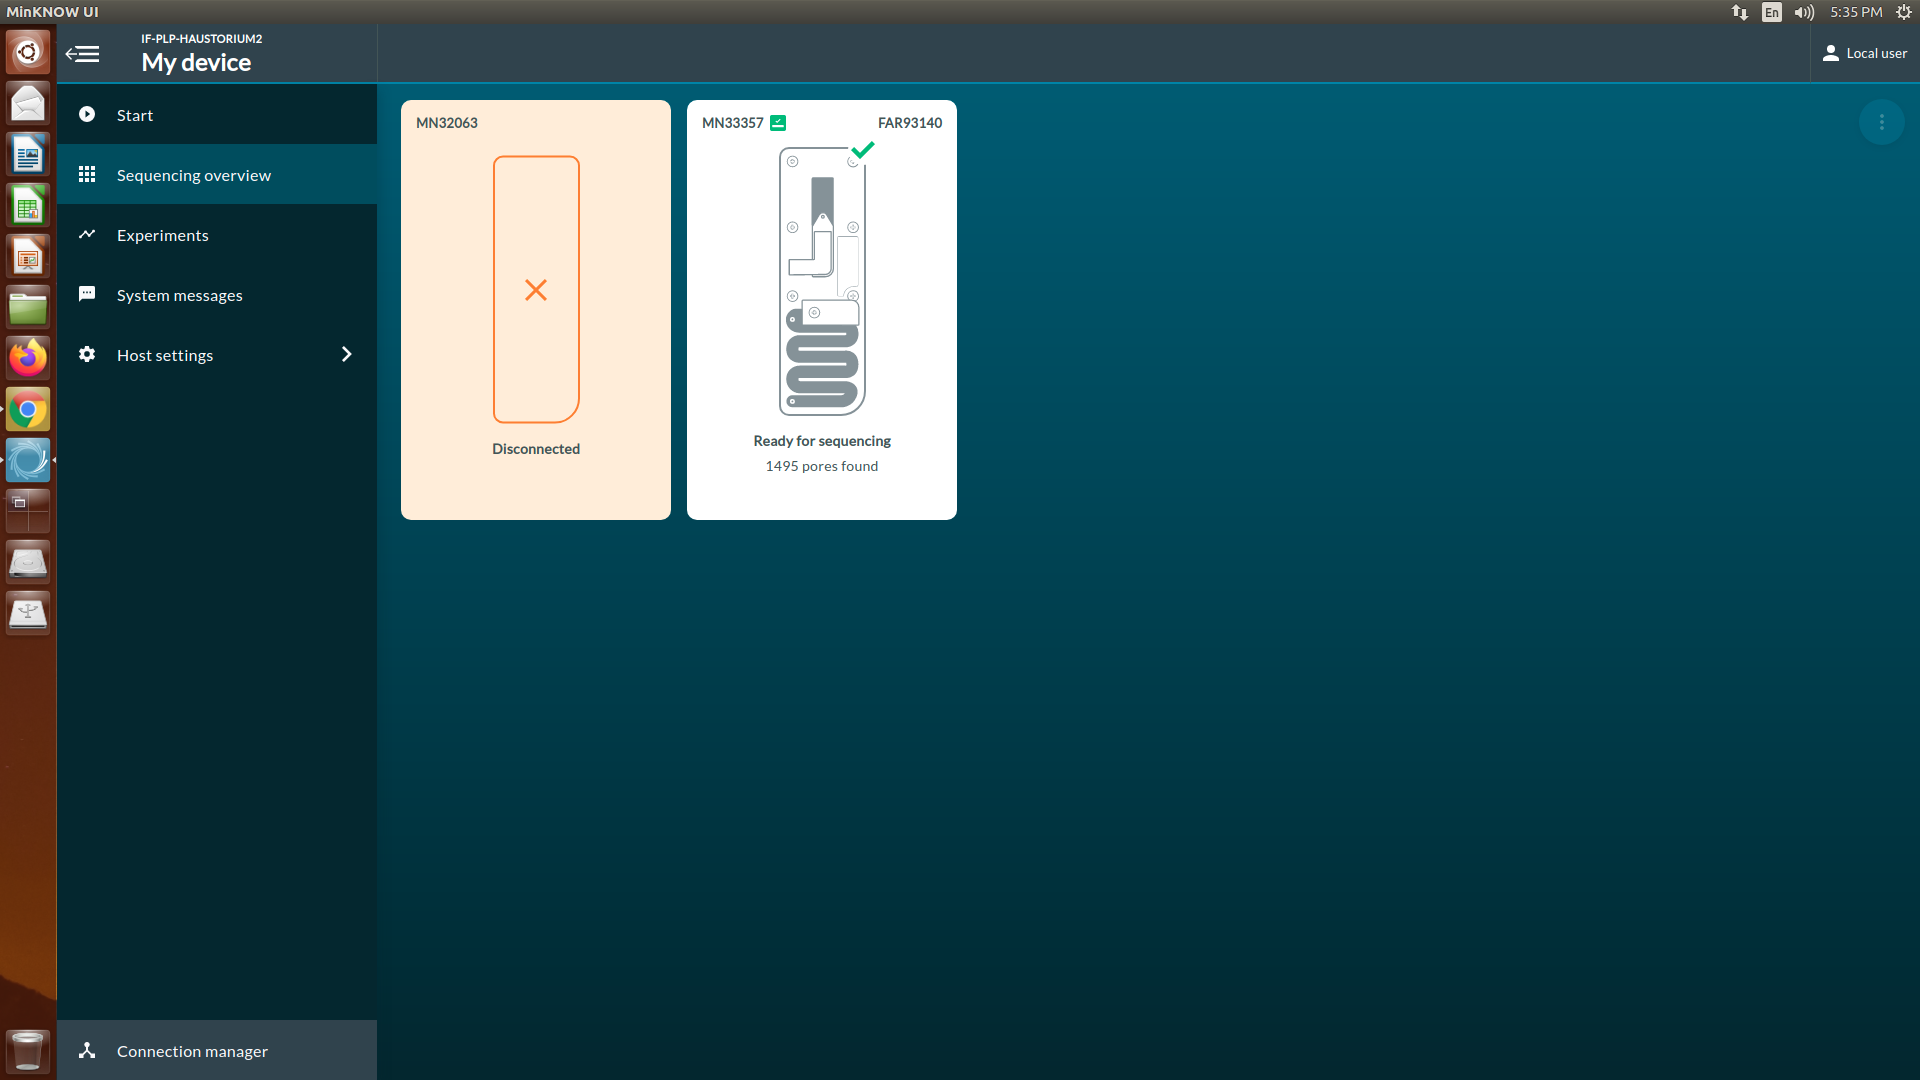
[Step 4] If you insert the new flow cell, the overview will show that the flow cell has not been checked (orange question mark).
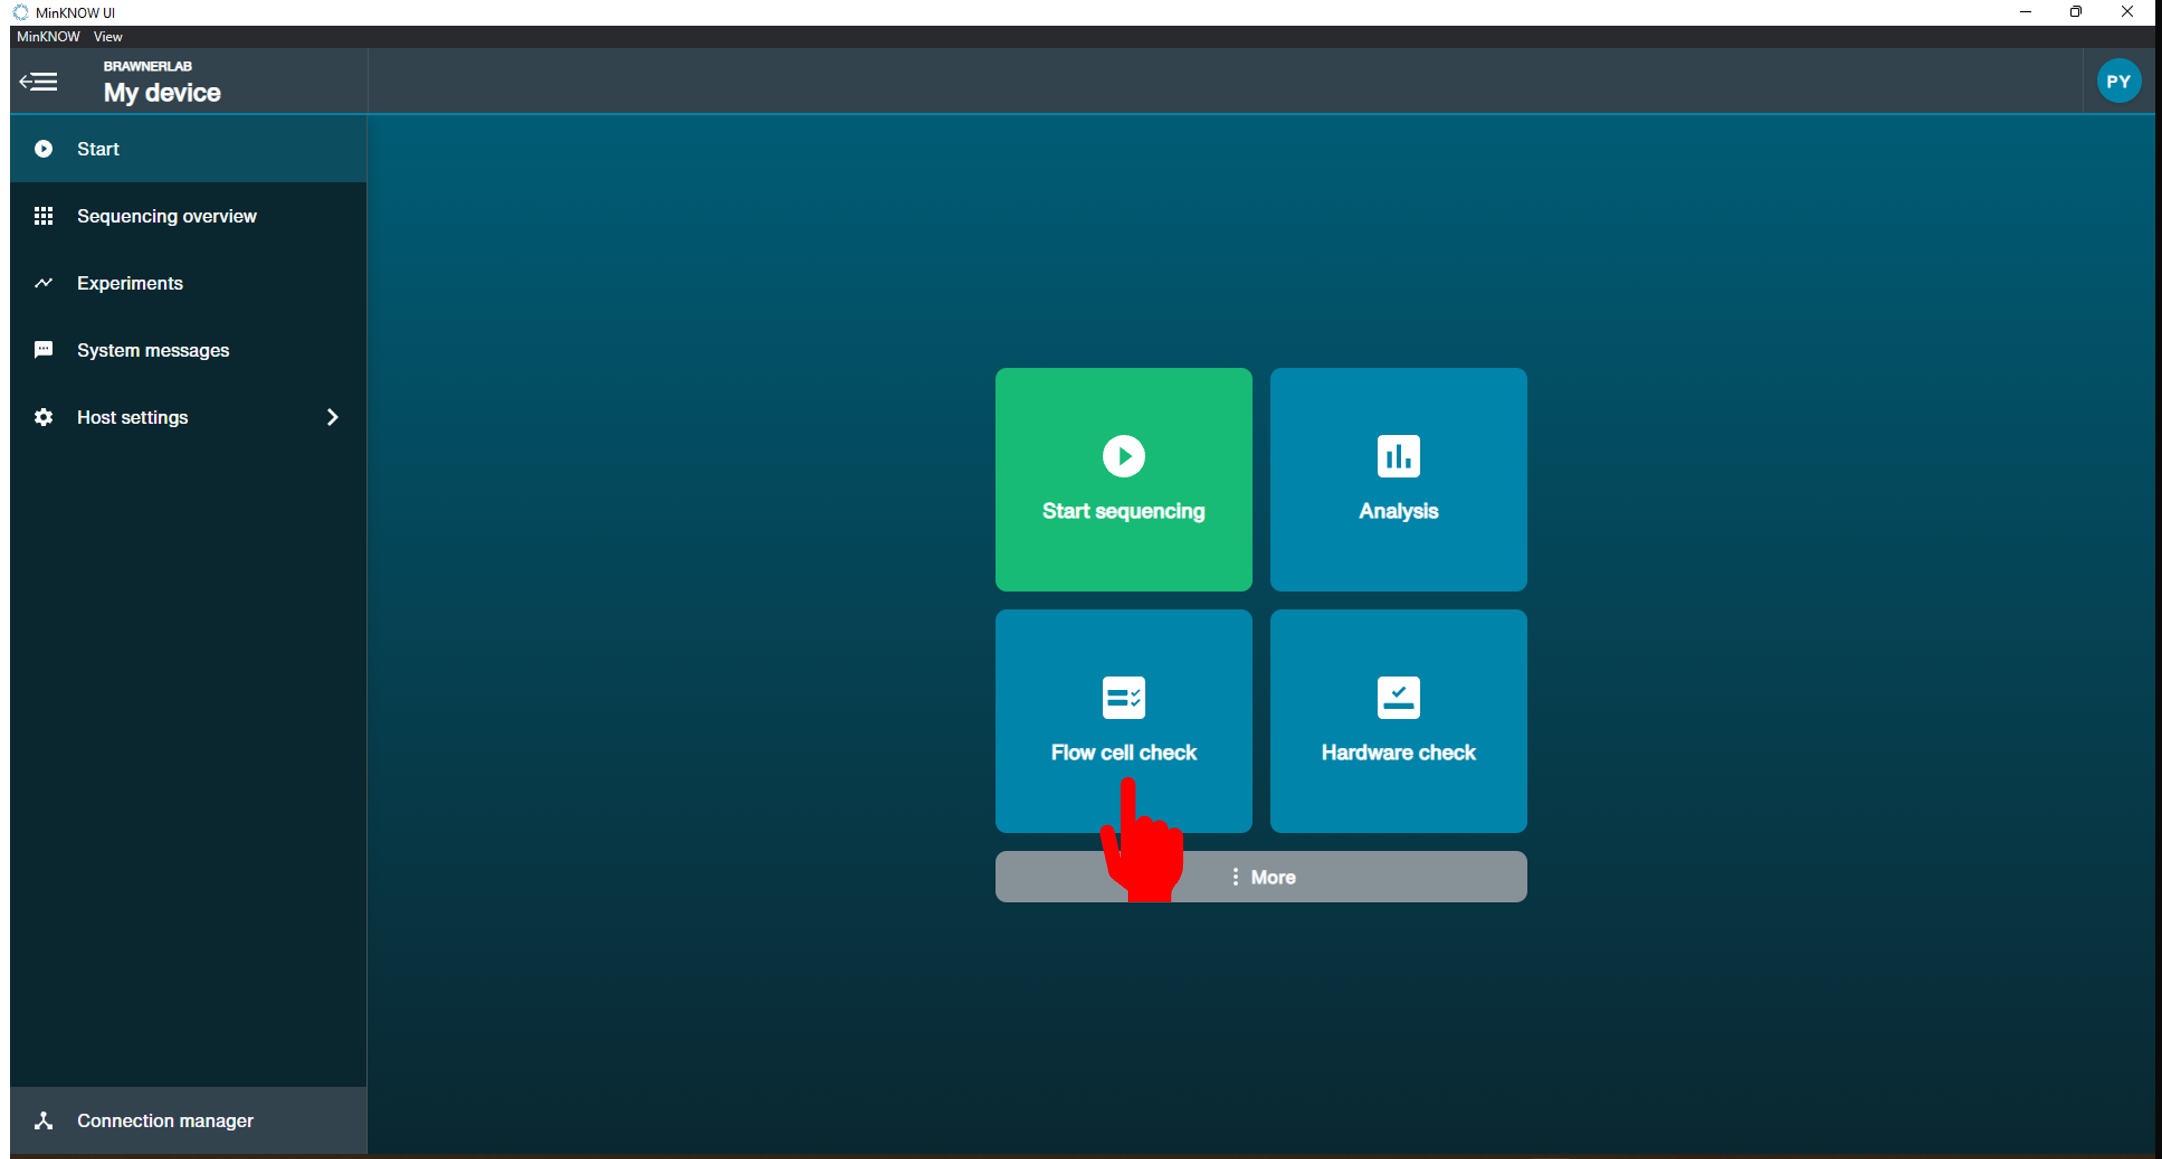
[Step 5] Click start and select Flow cell check.
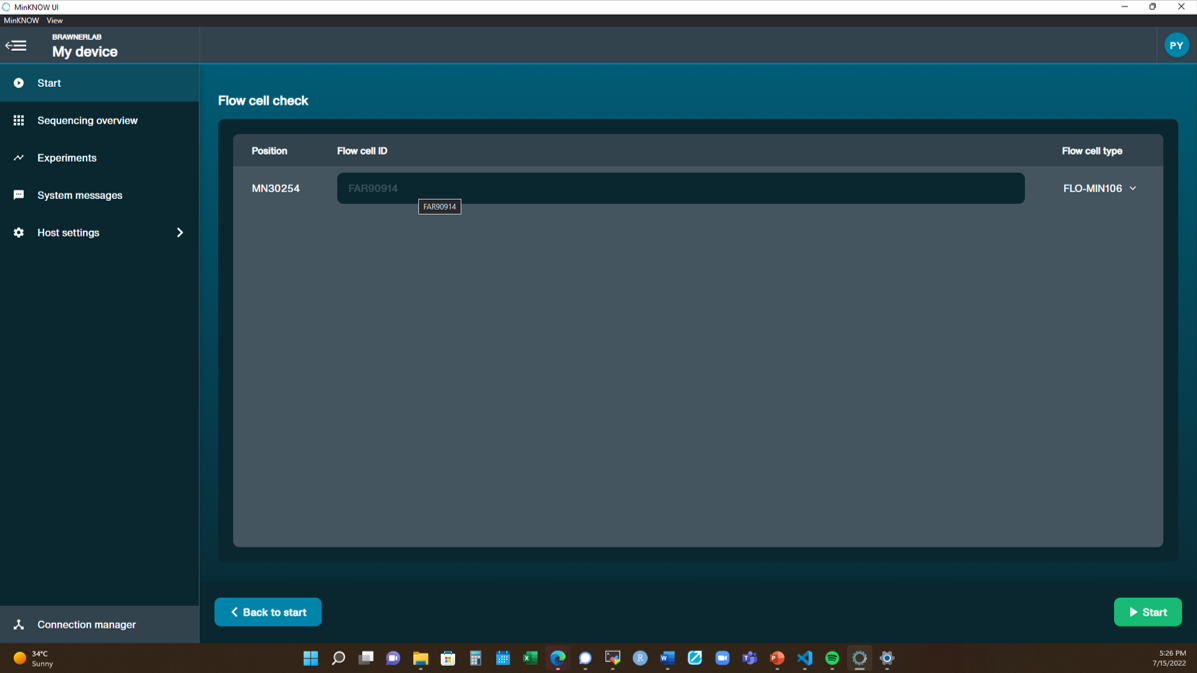
[Step 6] The system detects MiinION Flow cell ID automatically. Click Start.
[Step 7] It will take about 5 minutes to finish flow cell check. Two types of output:
Yellow exclamation mark: The number of active pores is below warranty number.
Green tick: The number of active pores is above warranty number.
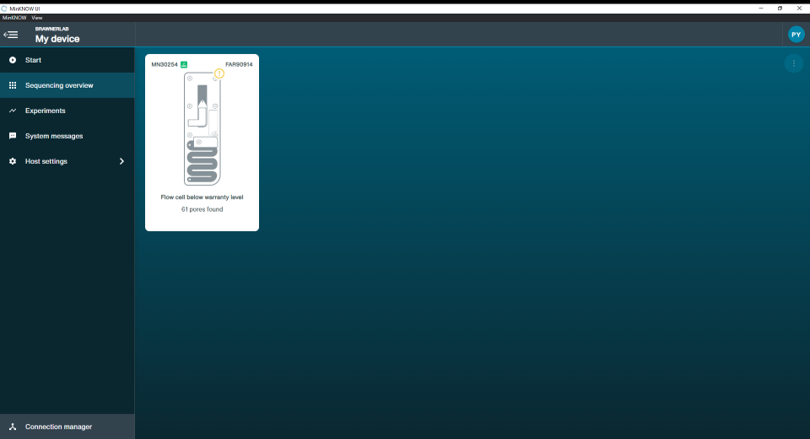
Do not panic when you see a yellow exclamation mark in this workshop. We provided everybody used flow cell.
Priming and loading the flow cell
Please review this video for demonstration (you might start from 00:18 to skip the intro):
Loading the flow cell
DO NOT pipette while you are priming or loading the flow cell. Pipetting might lead to irreversibly damage to the membrane.
[Start sequencing]
Due to the space and time limitations. Participants *will not initiate sequencing. Yet, instructor will demonstrate the sequencing process.
[Step 0] Running the flow cell check with the new or washed flow cell.
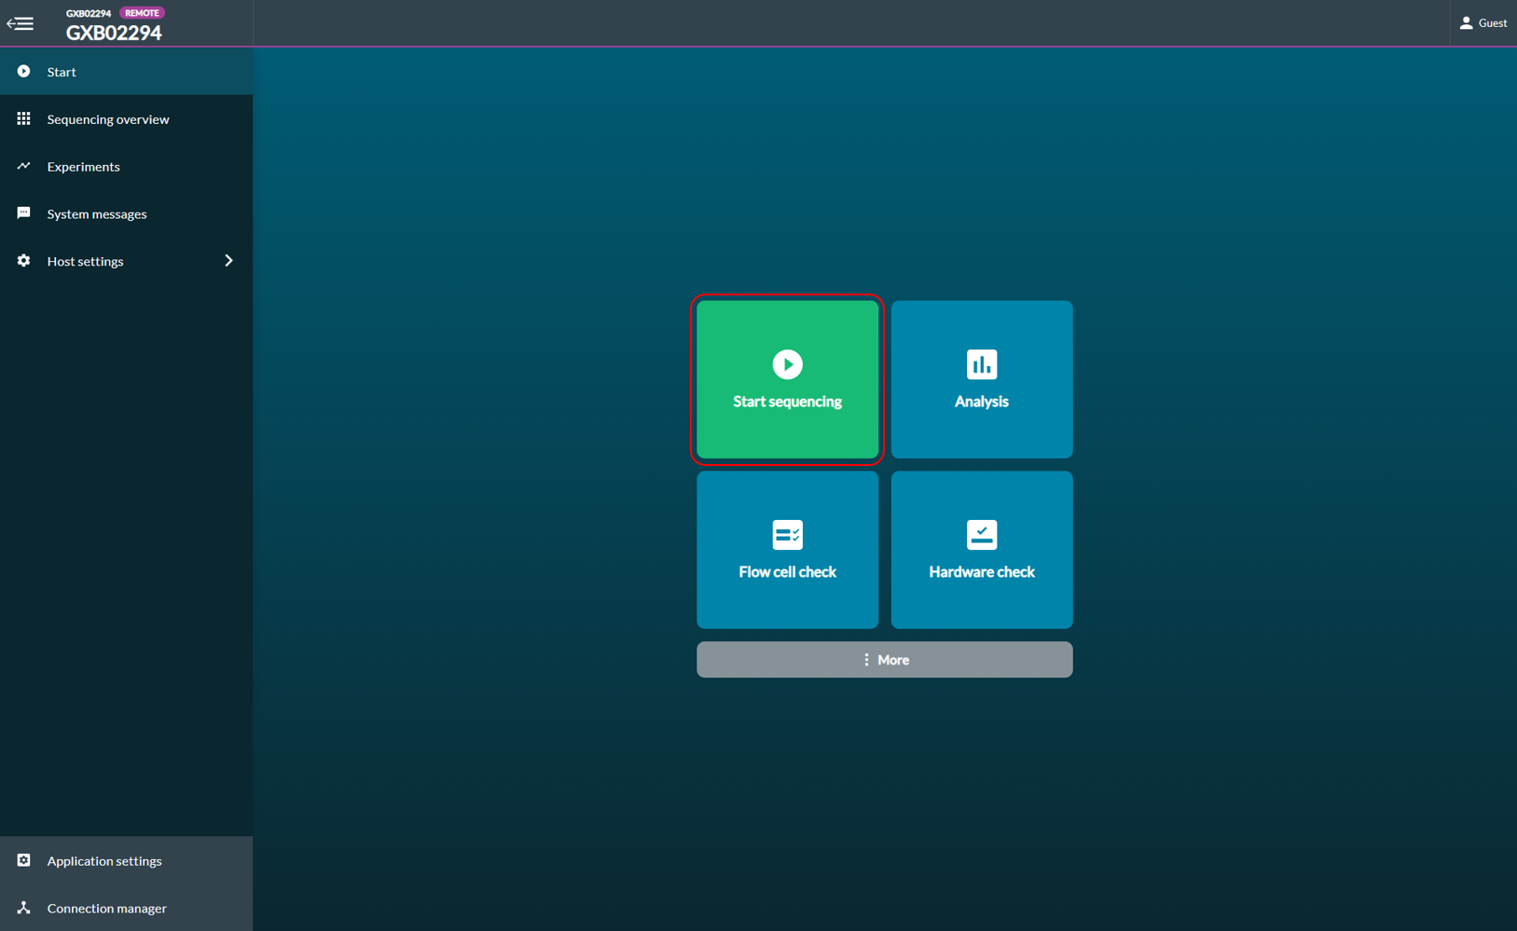
[Step 1] At the homepage, click Start and then select Start sequencing
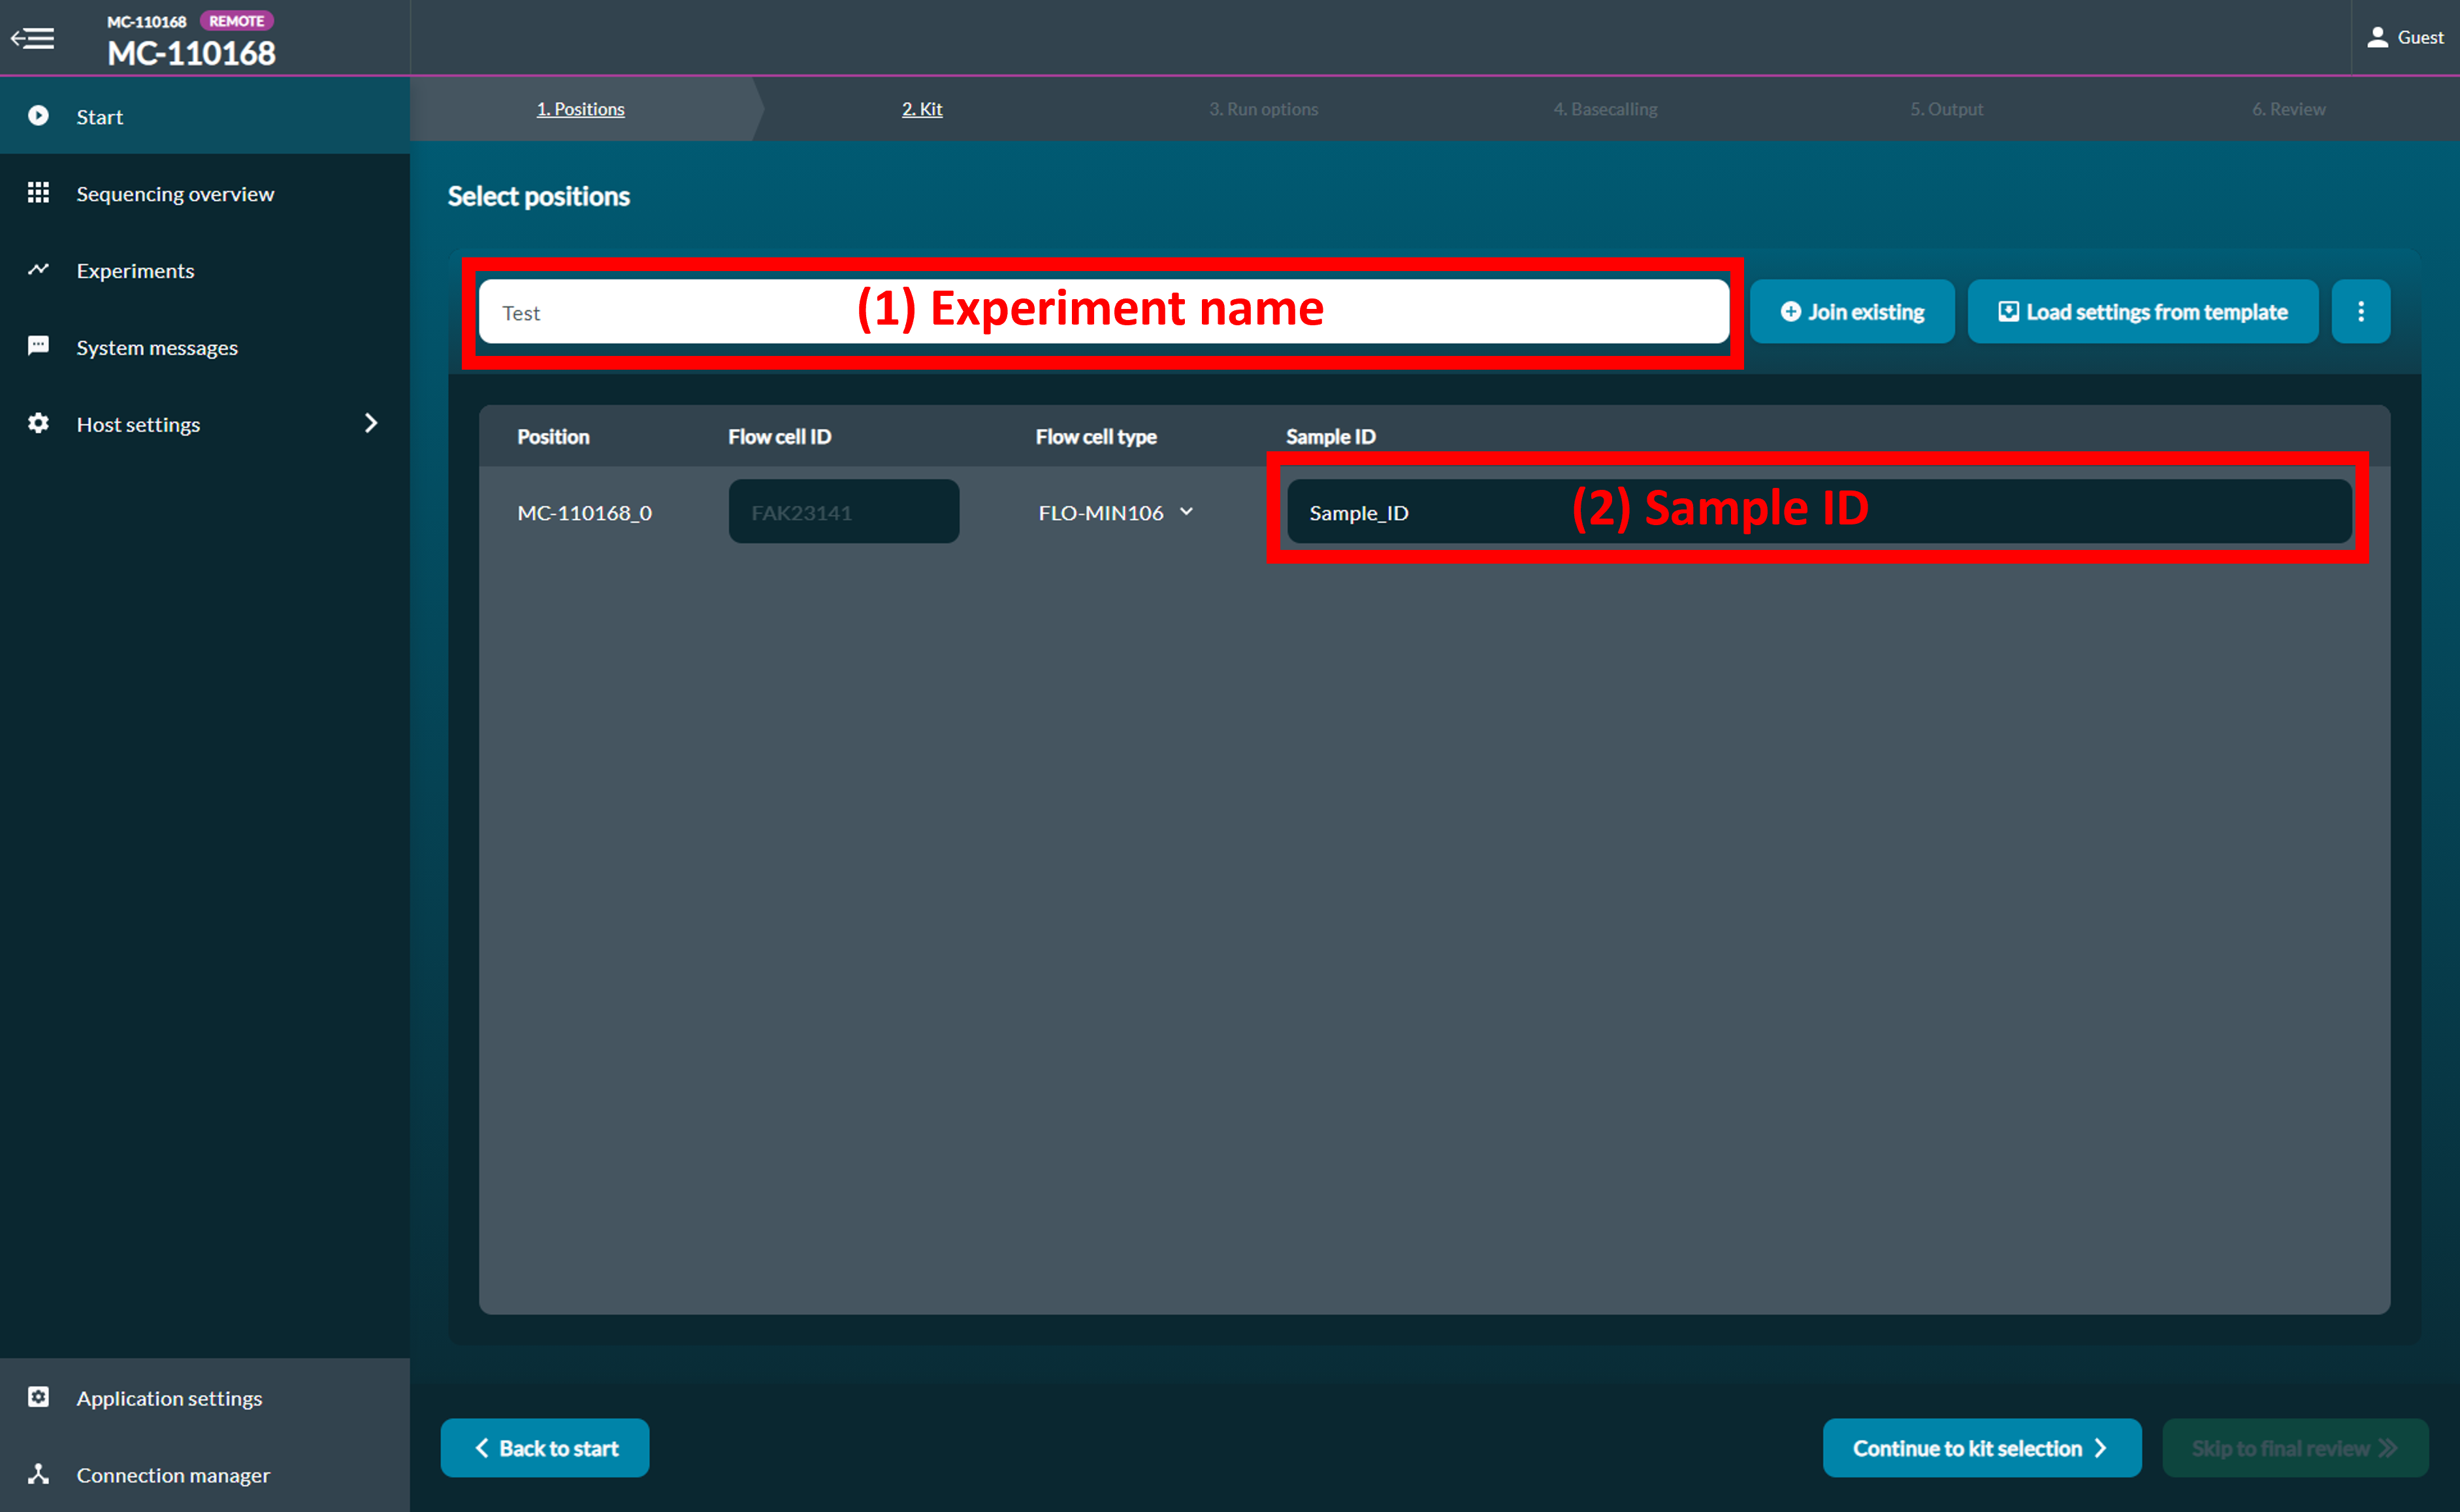
[Step 2] Fill in the following information: (1) Experiment name (2) Sample ID
Click Continue to kit selection.
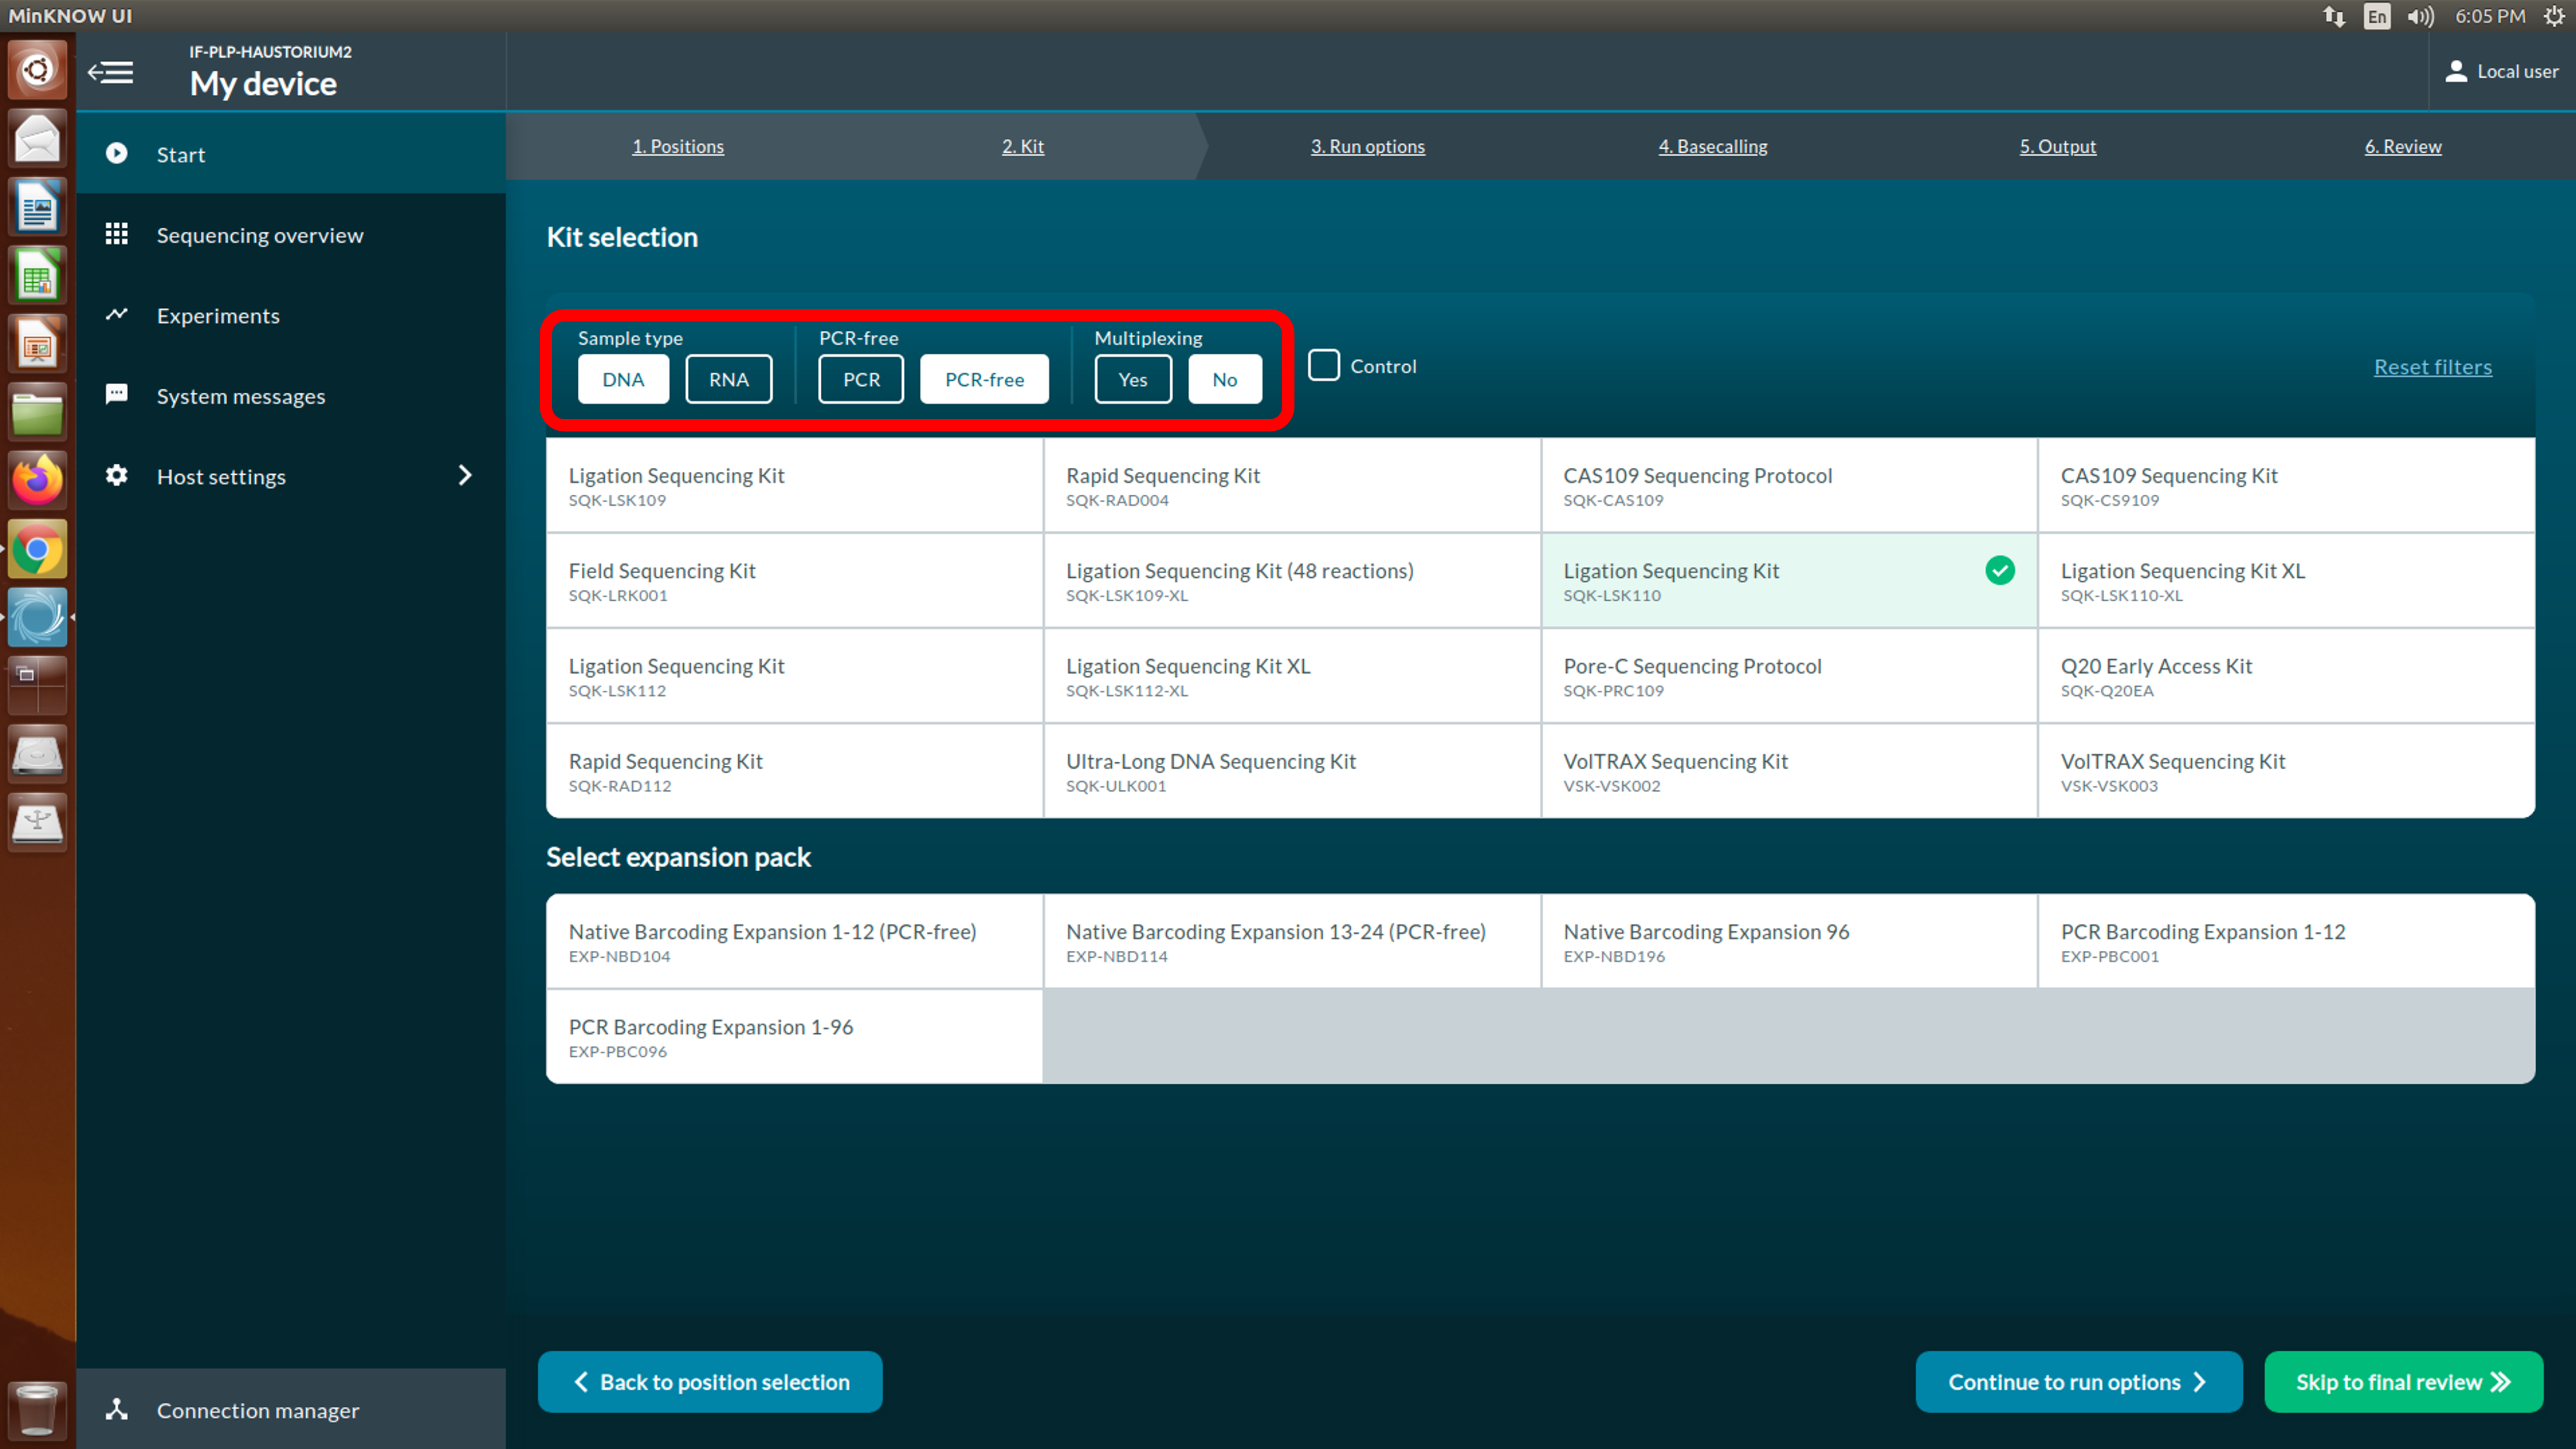
[Step 3] Select the Ligation sequencing gDNA (SQK-LSK110) used for this experiment. Select options to narrow down the list of kits.
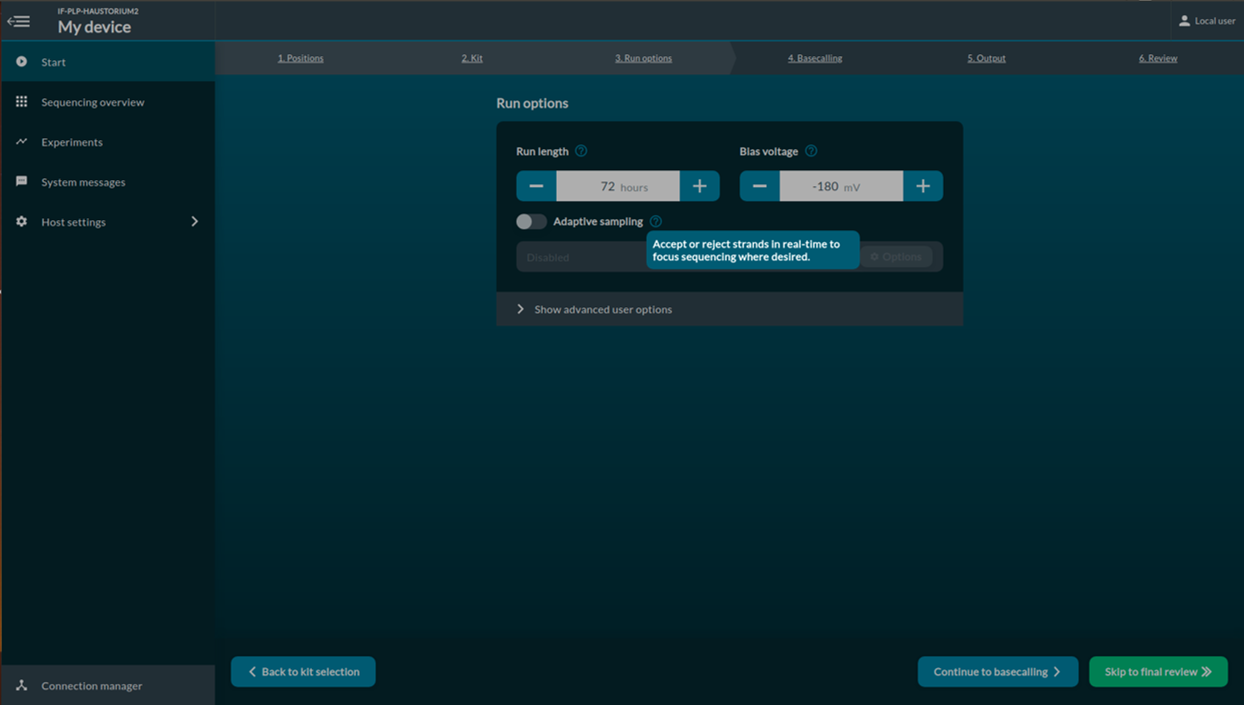
[Step 4] Select run options. Change Time and read length.
Click Continue to basecalling
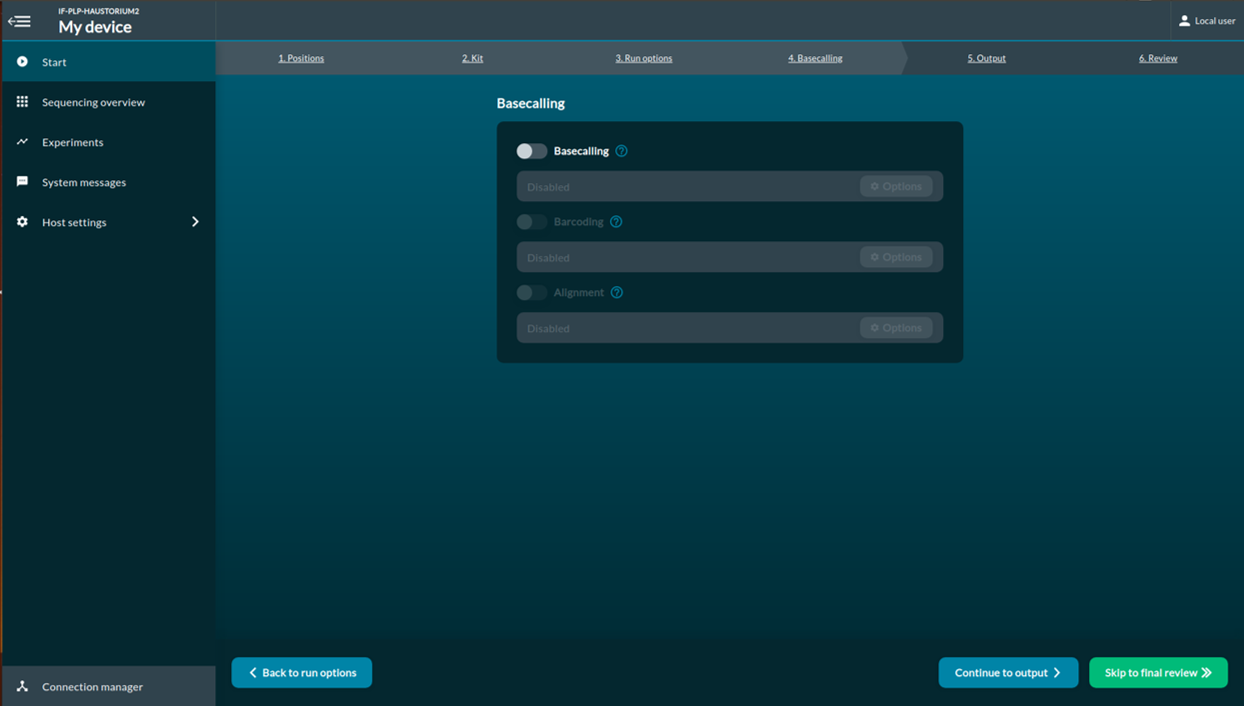
[Step 5] Choose basecalling, barcoding and alignment options. To save the disk space, we will not perform real-time basecalling.
Click Continue to output
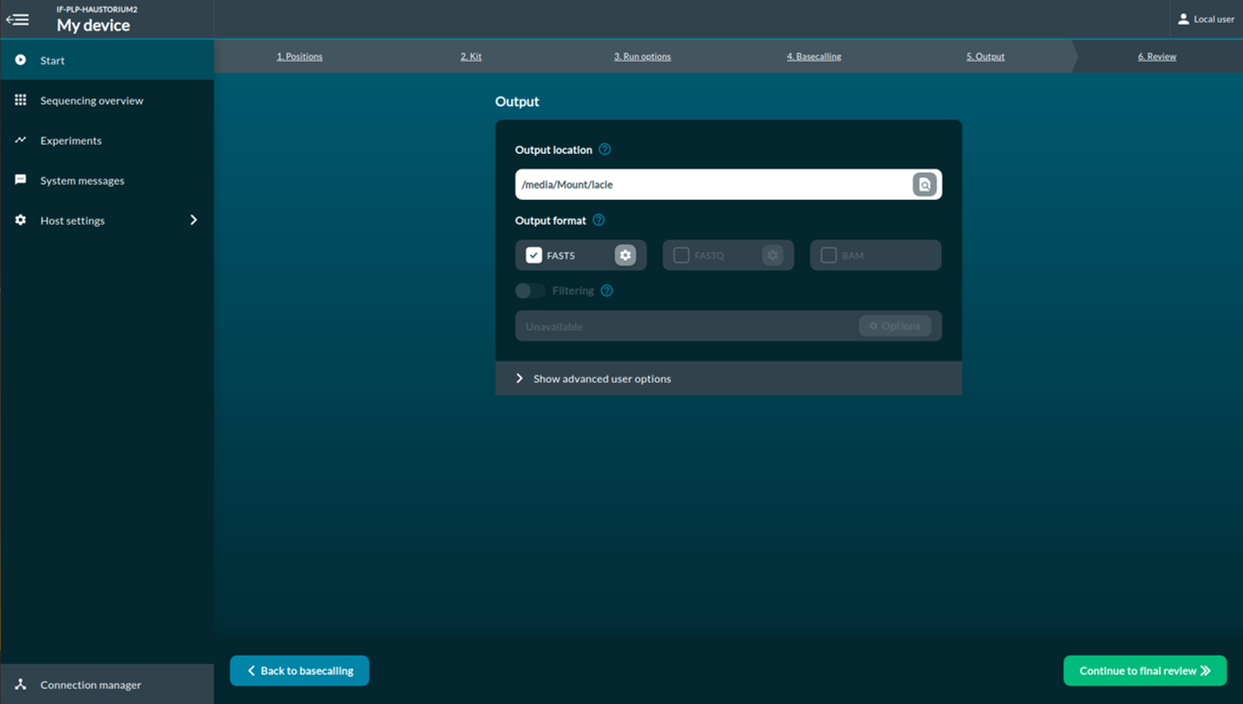
[Step 6] Select the output data location, format and filtering options.
Click Continue to final review
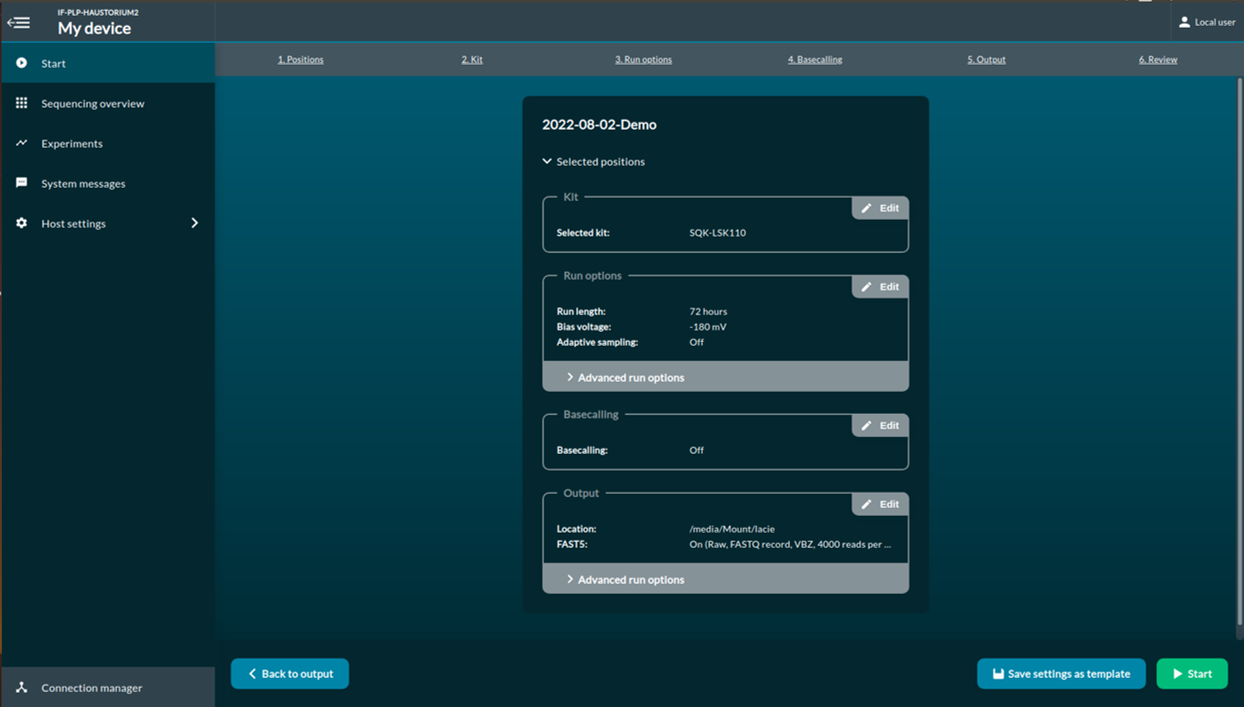
[Step 7] This Review page is an overview of the selected options.
Click Start
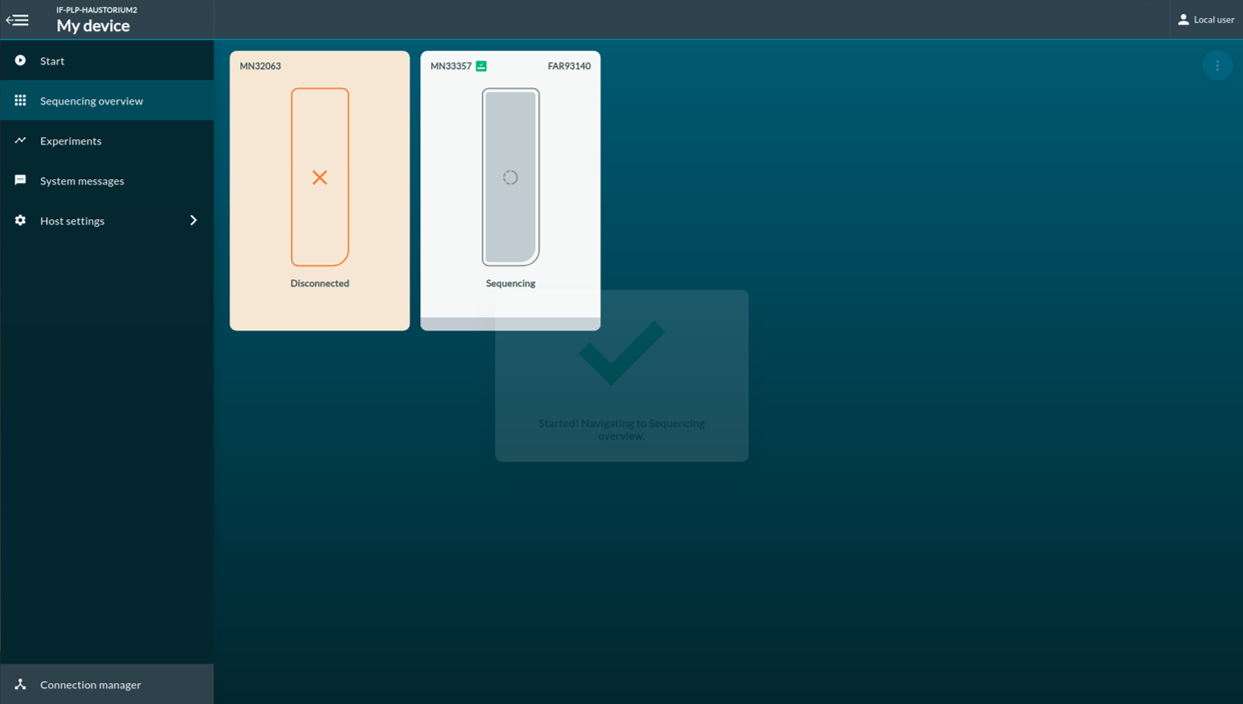
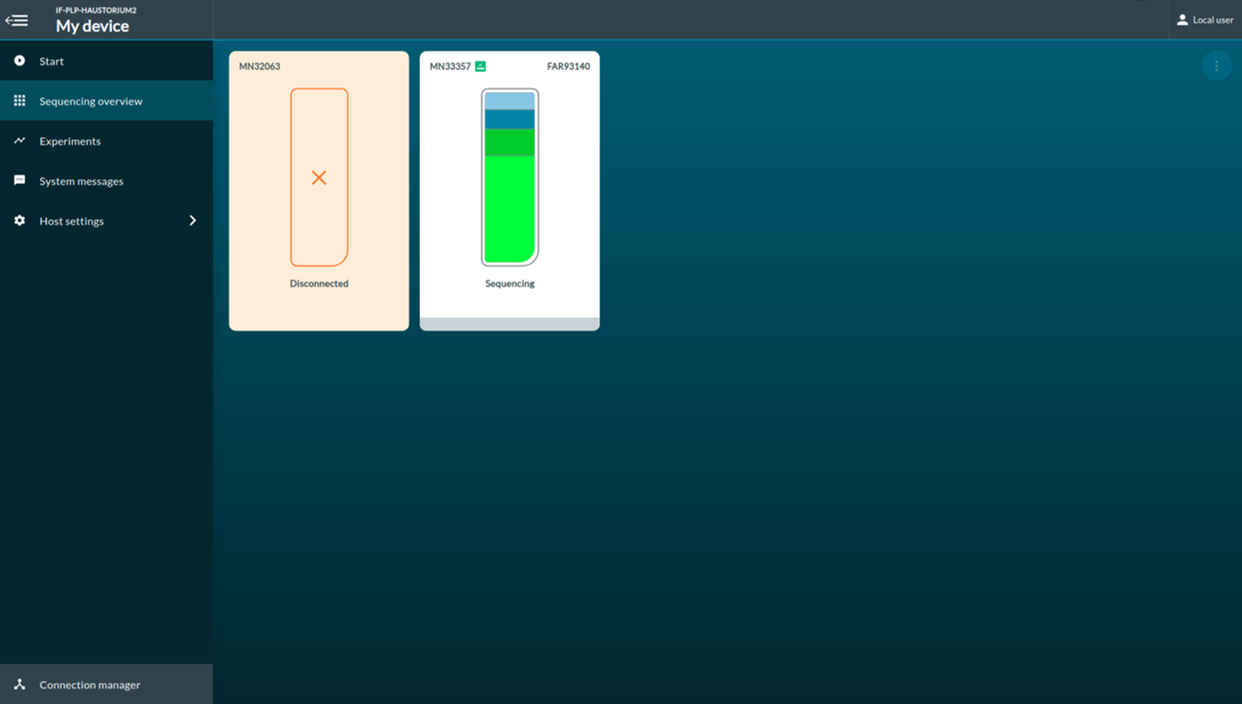
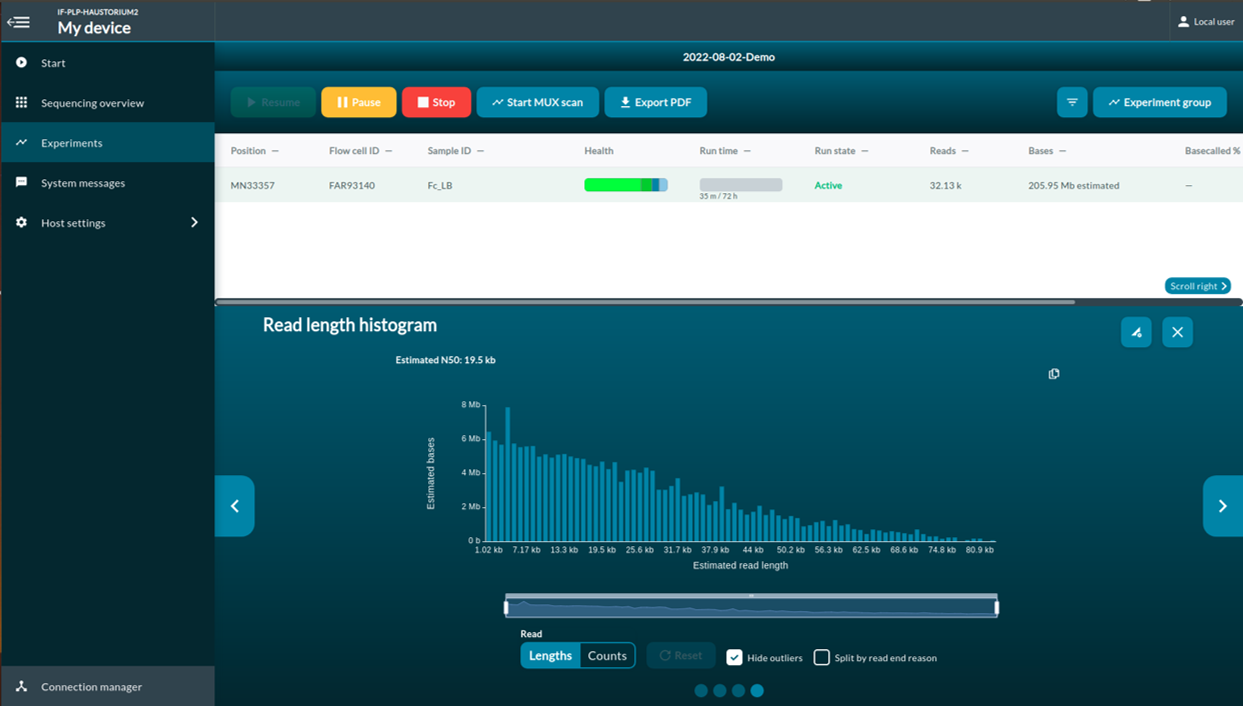
[Step 8] You will be redirected to the sequencing overview once sequencing starts. A report of flow cell pore health will be provided after first multiplexer (pore) scan.
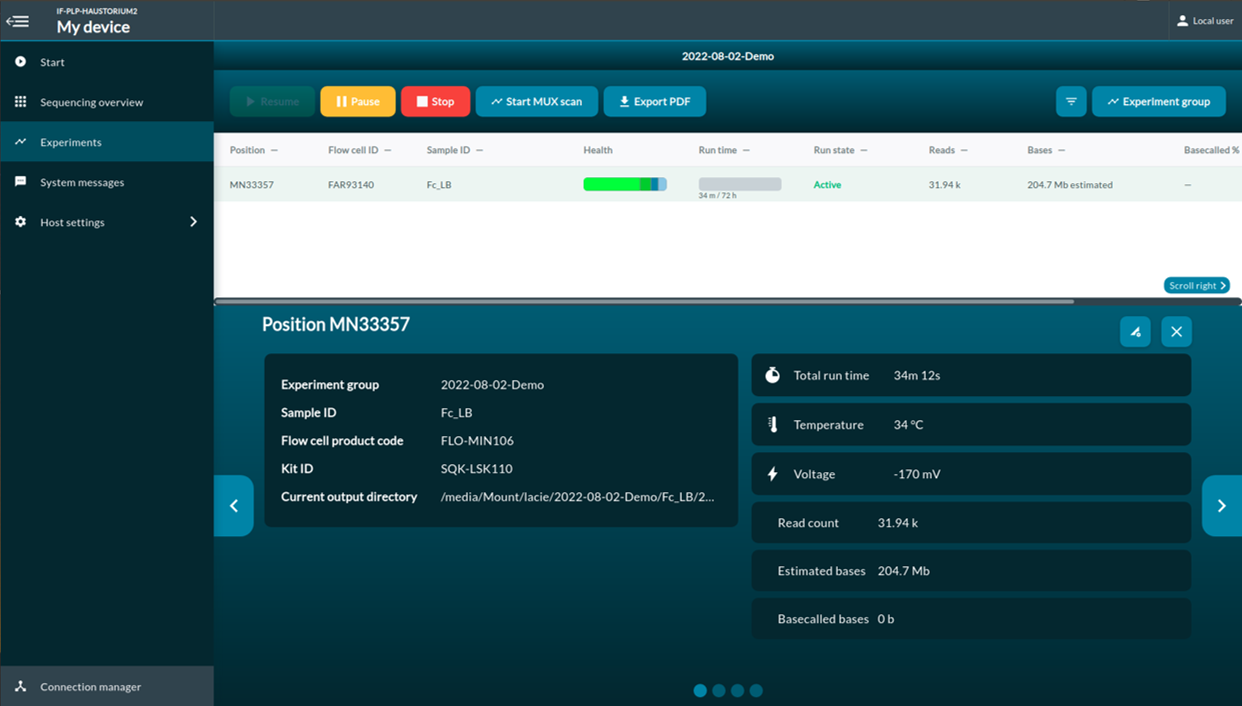
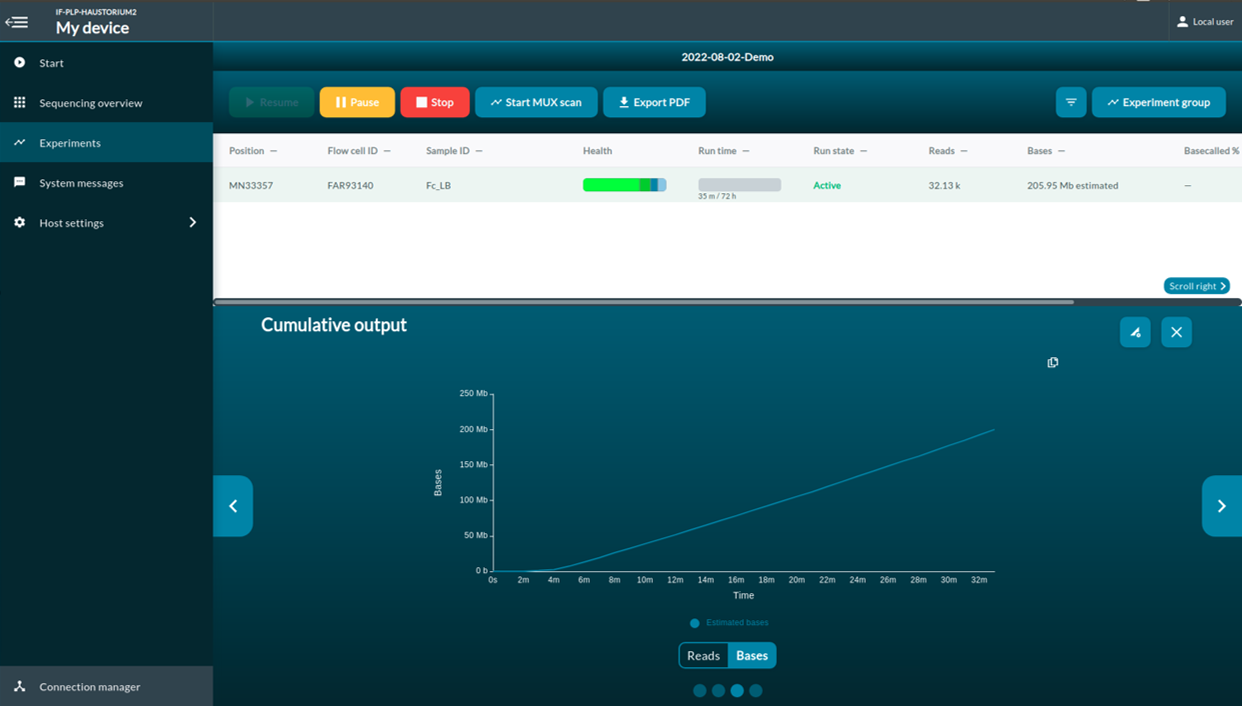
[Step 9] Click Experiments. You can access to the real-time report of the sequencing report.

The multiplexer (MUX) scan
Once the sequencing protocol is initiated, a pore scan will start before sequencing. MUX run allows MinKNOW to divide active pores into four groups, which let MinION to prioritize the order of the pores to be used for sequencing. Group 1 will be used in the first 8-hour run. Pore prioritizing maximize the data output. To have maximum number of pores that are available for sequencing, you should selection Active channel selection. When Active channel selection is on, MinKNOW will try to switch to a new pore once the pore is in the ‘Saturated’ or ‘Multiple’ state.
Addtional reading materials
- Assessment of Nucleic Acid Purity-Technical Note 52646
- 260/280 and 260/230 Rations-T042-Technical Bulletin
- Qubit fluorometric quantitation vs. spectrophotometer measurements
- DNA Qualification Workflow for Next Generation Sequencing of Histopathological Samples
- DNA Integrity Number (DIN) with the Agilent 2200 TapeStation System and the Agilent Genomic DNA ScreenTape Assay
- Community-Online crouses
- Community-Documentation
- Priming and loading the SpotON flow cell for MinION
Key Points
Avoid introduce the bubbles when laoding the flow cell.